Category Archives: Crafty Techniques

Day 2 Coloring Challenge

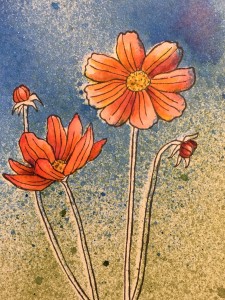
image …we’ll this is MY day 2 Coloring Challenge as I probably will not make 30 separate posts over the challenge! At any rate, I did color in the flowers a bit this morning – using my Stampin’ Up! Stamp pads, a bit of water and a very small paint brush.  I like to layer and combine colors, so these flowers were done with FIVE different colors!

IMG_0006


I like this so far… now to the stems.

Have you taken up the coloring challenge yet?

Making Use of Supplies

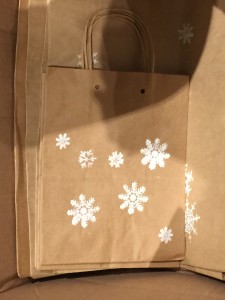
2016-0117 Stamped BagsTrue Confessions – I have, literally, a TON of papercrafting supplies: Stamps, Dies, Paper, Inks, Embossing Folders, Ribbon, Embellishments, Markers, Cutters, Punches, Rollers, and some things I am sure I have forgotten. I could easily open a store! Soooooo nothing makes me happier than being able to USE those supplies in some way. (DUH!). I am very involved with a local art gallery (The Art Gallery of Fell’s Point) and we just moved the gallery to a new location (1926 Fleet Street) and I was in there last night setting up our new point is sale system (Square Register). We are in the throes of unpacking and re-organizing all of our STUFF and I looked around at some point and saw THIS!

So today’s inspiration post is something that I actually STAMPED!  A friend and I made these for the gallery last year using stamps I had on hand and white acrylic ink (none of my white stamp pads would leave this bold an image).  We spent an evening and stamped about 300 different sized bags, and punched holes in the top to tie with gold ribbon.  There is also gold tissue paper that goes inside the bag, and we die-cut 300 tags out of matching card stock (Crumb Cake if you are curious) and stamped those with the white snowflake and “to & from” on the back.  We used some of them last year, and we have plenty left over for this year.

So I am thrilled that I was able to use my stamps and craft supplies for the good of the gallery, and that the effort will last a second year!  My inspiration photo also reminds me that cards with snowflakes are still in season for another month or so!  Here are some ideas:

Stamp the snowflake with versamark and brush with sparkly mica powders, Sentiment – hope your birthday Sparkles!  You could also die cut a snowflake with silver glimmer paper or stamp with versamark and emboss with silver or white embossing powder.  Spritz with some vanilla shimmer ink.  One more idea – die cut a piece of card stock the size of your card front with a snowflake, circle the back around the snowflake with snail or glue and adhere a clear plastic circle to it.  Circle again with dimensional adhesive, add some glitter, sequins, seed beads  or tiny glass beads and place the card carefully over top so that the adhesive is sealed all around the glitter.  You can add your sentiment to the outside or inside of the card for a fabulous shaker card!

Have I inspired you today with a simple snowflake?  I am glad that today it was the stamped version and not the PILES of snow we could easily be getting this time of year!

Technique of the week!

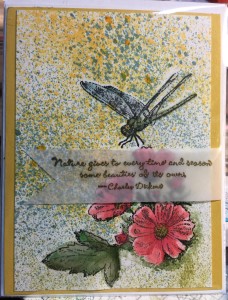
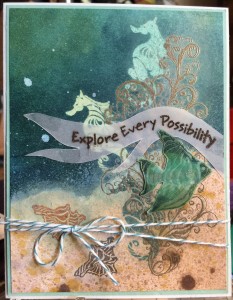
I just can’t stop masking images on cards this week!  From making a single layer card look three dimensional to creating complex scenes, I just love masking!  First I stamp my image on plain white copy paper in black ink.  Then I fussy cut around the image, staying as close as I can to the black edge.  I’ll put a dab of snail adhesive on the back just to hold it down for a little while until I have either stamped over it or spritzed a background on the card.   Sometimes I will even stamp and fussy cut several images or even 2 or 3 of the same image (such as a flower) so that I can stamp, mask, stamp, mask and stamp again until my “montage” is complete.   You can even use dies such as clouds or torn paper to create hills or sky scenes.  There is just no end to the creativity!  Here are a few of the cards I did this week – can you figure out what was masked?

Love is Kindness Stampin' Up! Vintage stampOn Gossamer Wings Stampin' Up! vintage stamp set

Ocean Commotion Stampin' Up! Vintage stamp set

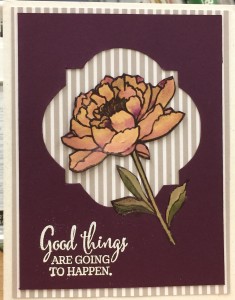
Good things are going to happen!

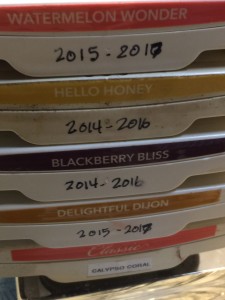
My stamp of the month – “You’ve Got This”.  I think this is my favorite example so far!  A little fiddly with fussy cutting around the flower, but this is stamped on blackberry bliss card stock with versamark and embossed with clear.  Then brush on BLEACH inside the flower lines.  The paper bleaches to a light buff color which I then re-colored with blackberry bliss ink that was diluted with water for the flower and mossy meadow for the stem and leaves, also diluted.  So pretty IRL.  Shop for this stamp and supplies at www.mystampalooza.stampinup.net or message me to place an order for you!  Subscribe to my monthly newsletter for next month’s stamp of the month – card sketches, tips and techniques!Good things are going to happen card

Grateful for You!

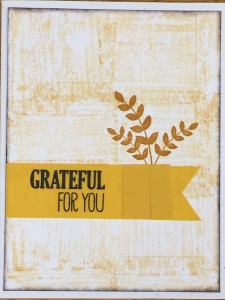
Grateful For You

For All Things Stamp Set

I love the stamp set “For All Things” (#135155 Clearmount $18) It is simple and watercolor-y and mostly, not just for Fall!  This card uses my Technique Quickie for the month – inking up your acrylic blocks for a quick background!  I’ve also used the new cotton paper for the banner.  It is sooooo thin!  If I hadn’t pleated the strip, the floral sprig would have shown through.  It was a bit tricky to stamp on – the Stazon in would have dried a little quicker then the Memento Black that I used.    I’ve got card sketches, techniques and featured stamps every month on The Stampin’ Nooz.  If you didn’t get your copy this month, sign up in the box to the right and you’ll be in the que for the July tips & techniques!

What’s my NEWSLETTER?

Oh I WILL have one, but what will my newsletter be NAMED?  That is my quandary.  I SWEAR by the end of this week, there will be a name.  I, of course, want a very CLEVER name, and my pea brain is not coming up with anything positive and clever.  Now I have thought of:

“You sNEWs you lose” (yuk)

“Stampa-NEWS-a” (ok, maybe)

“Everything Stampy” (hmmmm)

“Stampin Nooze” (so far #1)

…you see where this is going…

So any suggestions I can get from you blog-readers out there – FIRE AWAY!  Clearly I need HELP naming my Newsletter!


#TBT Googly Ghouls Boooo Card!

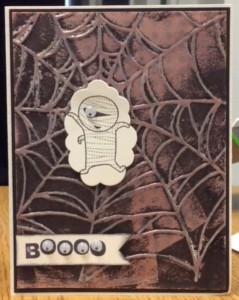
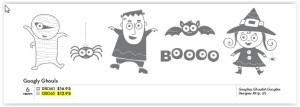
Well we are NEARLY to October, so what could be better than a CREEPY Halloween Card!  Now’s the time to claim your 2013 VINTAGE Googly Ghouls stamp set.  Don’t think I can give up the spider web folder, though!

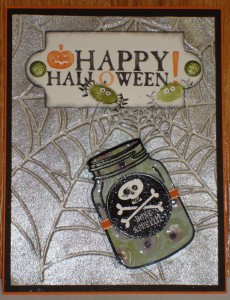
Boooo CardHere’s the card from the Googly Ghouls 2013 stamp set (retired already!).

Lots of other ways you can do the card using the many images in the stamp set:

2013 Googly Ghouls


A hint for the techniques – clear embossing, vellum and black ink spritzing!


Here’s how #TBT works!  If you want this wonderful vintage stamp set, you may purchase it for $9.00 plus shipping. (US purchases only please).  You will receive the stamp set and the card!  IF you purchase the stamp set AND place an order (www.mystampalooza.stampinup.net) for at least $30 of merchandise, you will receive (besides your order of awesome Stampin’ Up products), the vintage stamp set, handmade card and envelope, a selection of vintage Stampin’ Up embellishments (googly eyes Googlie Eyesand 4 vellum embossed spiderwebs) AND the instructions for making the card above!  Please email or comment on this post if you are interested in one or the other!  This is a limited time offer, and you have until midnight next Thursday – then there will be a different, wonderful, vintage stamp featured!

Listed below are the current Stampin’ Up products used for this card.

101856 White Vellum (20 sheets) $6.50
102316 Naturals White Cardstock (40 sheets) $7.50
121045 Basic Black Cardstock (24 sheets) $6.95
101910 Shimmery White Cardstock (10 sheets) $7.95
109130 Clear Embossing Powder $4.95
126185 Stampin’ Spritzer $2.95
133773 Sponge Daubers (5) $4.95
102283 Versamark Inkpad $7.50
126980 Basic Black Inkpad $5.95
102512 Basic Black Ink Refill $2.95
107301 Whisper White Envelopes (40) $6.50
132172 Envelope Liner Framelits $26.95
132968 Word Bubbles Framelits $24.95
104332 Snail Adhesive $6.95
104430 Stampin’ Dimensionals $3.95
118485 Clear Mount Block D $8.50
113439 Big Shot Die Cutting (& Embossing) Machine $99.95
129053 Heat Tool $29.95

Bleach! Technique of the Week!

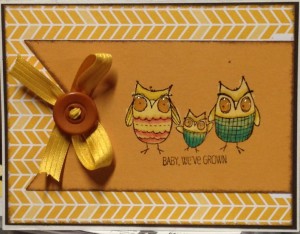
One of my favorite “inks” actually removes color – that’s Bleach!  This is more effective on medium – dark solid color card stock.  I usually stamp an image with versamark and then emboss with clear or colored embossing powder.  Then I put some bleach in a small container and “paint” with a small brush over the image inside the embossing.  This keeps the bleach effect from spreading outside the lines.  Very shortly, the color of the paper bleaches out to a lighter color – sometimes one you don’t expect!  After the bleach dries thoroughly (you can use a embossing/heat gun to dry if you are in a hurry), go back and ink up the resulting lightened image with markers.   There are a couple other methods to use bleach in stamping cards, but I’ll save that for another week ;-).  Here’s my sample, using a card from a Project Life pack as background, and the “Baby, We’ve Grown” stamp set.  I’ve added a few dots of Crystal Effects over the Owl Eyes!

Bleach Baby

To order any of these products, be sure to shop at www.mystampalooza.stampinup.net.  To join my mailing list and subscribe to my NEW monthly newsletter, Stampin’ Nooz, enter your name and email address to the form on the right!

Fiddley Level = 11! (Day 6)

Spidey #2 – on the Label…

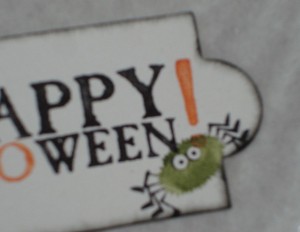
I inked the spider image from the “Spider Cider” stamp in the “Monster Munchies” set with Basic Black and Old Olive markers and stamped him on the corner of the “Happy Halloween” Label.  I also punched a 1/16″ circle on the inside of the “O” in Halloween (must have been AFTER I took this picture!).   I fed the top end of the fishing line with SPIDEY attached through that hole and adhered a dimensional over top. 

I punched a 1/16″ circle at each end of the label, and inserted old olive glimmer brads.

I added dimensionals at the four corners and attached to the top of the card. 

Now Spidey can climb up and down from his web to the jar of eyeballs!  CREEPY, Yes?

Here’s another look at the final card:

and, a video of Mr. Spidey doing his daily exercise!  <ed. sorry, couldn’t figure out how to get it embedded!>


Until then…Keep Calm and Find Yourself a Rubber Stamp!

Fiddley Level = 11! (Day 5)

A clear jar – challenge! – Window Sheet! Challenge solved! 

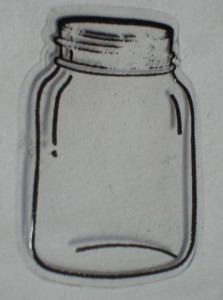
As you can see, I have stamped the jar from the “Perfectly Preserved” stamp set in versamark ink onto a piece of our awesome window sheet.  Then I embossed with black embossing powder.  If you have our NEW heat tool, there are 2 settings, and you can emboss on the low setting without melting the window sheet.  I CAREFULLY embossed with the old heat gun (only one setting – high!), by keeping the gun moving back and forth across the embossed area until all powder has melted. 

Then I cut the shape out with the jar from the “Cannery Set” framelits.  After this was done, I didn’t like the curved line at the bottom of the jar – so I just scraped it off with my fingernail!  In a perfect world, I would have masked the stamp with tape in that area when I inked it with the versamark, or removed the embossing powder with my fingernail before I embossed the jar, but the adhoc approach worked, thank goodness!
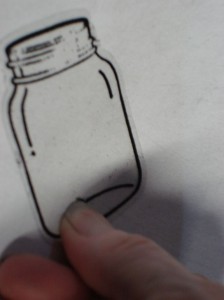
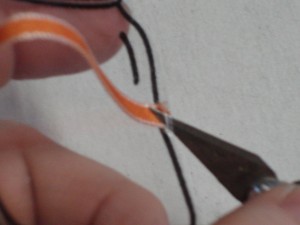
Next, I cut a slit in the plastic, right outside the jar line, to insert the ribbon.  I used my craft knife to “grab” the ribbon and pull it through the slit.  Since the Framelit cuts about 1/16″ outside of the stamp image, there is just enough room to make the cut.  I pulled both ends of the ribbon so that it sat flat on the “jar”.
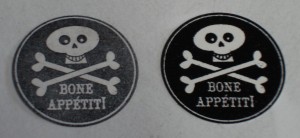
For the label, I tried stamping it in basic black on the shimmer paper (my favorite label material, since it is a little stiffer than the whisper white paper).  That was not quite dark enough for me, so I tried it with versamark and black embossing powder, and that result was PERFECT!
I snailed the back and attached it right over the ribbon. 

Now it is time to attach the “eyeball” layer.  I adhered two glue dots to the back of the clear jar, right behind the label, so you cannot see them from the front.  Then I snailed the back of the “eyeball” layer just across the center where the ribbon would go, and wrapped the ribbon around that layer.  

Now I punched a 1/16″ hole through both layers of the jar (window sheet & eyeball paper), near the top of the jar (see example).  This is for the spider’s fishing line!  Feed the end of the fishing line through the hole (make sure SPIDEY is still attached!) and add a dimensional over the end.  I adhered several more dimensionals to the back of the “eyeball” layer, and pressed it down to the spiderweb card front. 
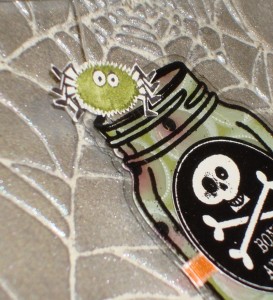
I think we are neeeearrrly finished!  Tune in for tomorrow’s wrap up!

Until then…Keep Calm and Find Yourself a Rubber Stamp!