Author Archives: Pat Baker

Thinlits to make DIY Bakers Box on sale this week!!!

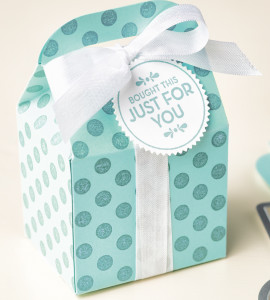
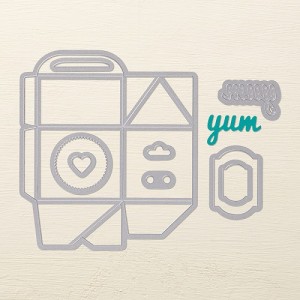
DIY Bakers BoxThere is nothing CUTER than a DIY Bakers Box!


This week through the Weekly Deals, Stampin’ Up! has a number of super cute things, one of them being the awesome Bakers Box Thinlits so you can make your own DIY BakersDIY Bakers Box Boxes.  There are so many options with this box!  You can make it from Designer Paper, Stamp on plain card stock, even emboss on vellum!  You can cut a window in the box with the included dies, and glue a bit of clear acetate or plastic inside to see the goodies.  I’m hungry just thinking about it!!!

What would YOU put in this adorable DIY Bakers Box?


Day 2 Coloring Challenge

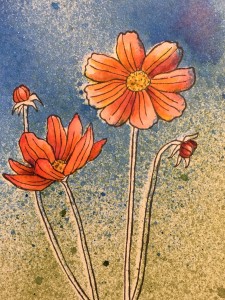
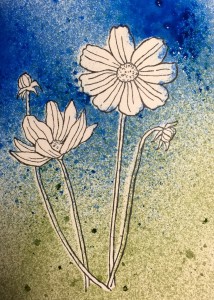
image …we’ll this is MY day 2 Coloring Challenge as I probably will not make 30 separate posts over the challenge! At any rate, I did color in the flowers a bit this morning – using my Stampin’ Up! Stamp pads, a bit of water and a very small paint brush.  I like to layer and combine colors, so these flowers were done with FIVE different colors!

IMG_0006


I like this so far… now to the stems.

Have you taken up the coloring challenge yet?

30 Day Coloring Challenge!

I just Love Sandy Allnock!  I’ve taken a class with her (at The Queen’s Ink), and she is fun and so great with her color lessons.  I have all the Copic Sketch Markers (!) and just can’t get enough coloring with them.  Sandy’s blog is on my everyday list and she has inspired me to go in directions that I would never have thought of (and to drool over several watercolor products that I hope someday to afford, because, like the Copics, I have to have ALL the colors!).  This week Sandy talked about the 30-Day Coloring Challenge on Kathy Racoosin’s blog THE DAILY MARKER.  Who doesn’t like to color? (I say…)  So I got started this am, not very far, I admit, but it’s a START!

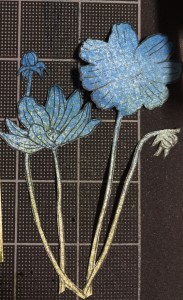
First I stamped and fussy cut THIS imageColoring Challenge1a from the Helping Me Grow brand new stamp set in the new Occasions Catty.  Then I stamped it again on my favorite paper (Shimmery White), placed the cut-out on top and spritzed with a couple different Smooch Spritz’s.  Clearly I was not worried about keeping the underneath image pristine, because I will be coloring and layering colors on top and often the serendipity of my “sloppiness” will actually enhancColoring Challenge1be the final image.  This coloring challenge is all about going out of your “safe” coloring zone and using OTHER coloring products in your stash.

So what will day 2 bring?  I have some ideas already! – Stay tuned!

Making Use of Supplies

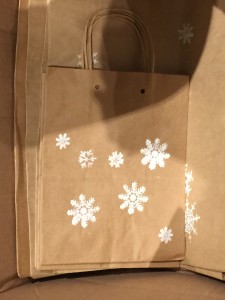
2016-0117 Stamped BagsTrue Confessions – I have, literally, a TON of papercrafting supplies: Stamps, Dies, Paper, Inks, Embossing Folders, Ribbon, Embellishments, Markers, Cutters, Punches, Rollers, and some things I am sure I have forgotten. I could easily open a store! Soooooo nothing makes me happier than being able to USE those supplies in some way. (DUH!). I am very involved with a local art gallery (The Art Gallery of Fell’s Point) and we just moved the gallery to a new location (1926 Fleet Street) and I was in there last night setting up our new point is sale system (Square Register). We are in the throes of unpacking and re-organizing all of our STUFF and I looked around at some point and saw THIS!

So today’s inspiration post is something that I actually STAMPED!  A friend and I made these for the gallery last year using stamps I had on hand and white acrylic ink (none of my white stamp pads would leave this bold an image).  We spent an evening and stamped about 300 different sized bags, and punched holes in the top to tie with gold ribbon.  There is also gold tissue paper that goes inside the bag, and we die-cut 300 tags out of matching card stock (Crumb Cake if you are curious) and stamped those with the white snowflake and “to & from” on the back.  We used some of them last year, and we have plenty left over for this year.

So I am thrilled that I was able to use my stamps and craft supplies for the good of the gallery, and that the effort will last a second year!  My inspiration photo also reminds me that cards with snowflakes are still in season for another month or so!  Here are some ideas:

Stamp the snowflake with versamark and brush with sparkly mica powders, Sentiment – hope your birthday Sparkles!  You could also die cut a snowflake with silver glimmer paper or stamp with versamark and emboss with silver or white embossing powder.  Spritz with some vanilla shimmer ink.  One more idea – die cut a piece of card stock the size of your card front with a snowflake, circle the back around the snowflake with snail or glue and adhere a clear plastic circle to it.  Circle again with dimensional adhesive, add some glitter, sequins, seed beads  or tiny glass beads and place the card carefully over top so that the adhesive is sealed all around the glitter.  You can add your sentiment to the outside or inside of the card for a fabulous shaker card!

Have I inspired you today with a simple snowflake?  I am glad that today it was the stamped version and not the PILES of snow we could easily be getting this time of year!

Keeping it RAW!

2016-0115 Salmon and tunaLast June I embarked upon a new journey, food-wise.  Up until then, I was consuming 2 Venti latte’s plus at least a 2-liter bottle of diet coke daily- and NO water (good grief there is plenty of water in diet coke isn’t there?).   I had been eating a somewhat vegetarian (including eggs, cheese, milk products and fish) diet for over 40 years, and was generally healthy,  but the pounds had slowly mounted up and I was just not happy about the weight, the caffeine, or the fake sweeteners.  So with some inspiration from the guys at work who were eating raw every other week, I decided to try it.  That first weekend with no caffeine was pretty brutal, but I stuck with it and lost about 10 lbs the first couple of months.  Plus I was off all caffeine, sugar, fake sweeteners, and milk products, and drinking LOTS more water.  I was feeling pretty good.  Then I discovered raw cashews.  Let’s just say that the weight loss came to a screeching halt (yup I was grazing through 3-4 lbs of exPENsive cashews every week).  Ok, had to give those up, too.  So now I am losing weight again.  To get the all-important protein quota each day, half is coming from protein-based Naked juices (which I make a 50/50 mix with the Naked Juice Green Machine) and the other half from sashimi – the raw fish they sell at sushi counters.  I have an orange and a slice of Ezekiel Flax Seed bread with a dollop of natural honey for breakfast, naked juice for lunch and sashimi for dinner.  If I am hungry later, I’ll have another Naked juice mix.  And to be perfectly honest, I still have a Venti Latte’ every day, but now they are Decaf, Soymilk and only 105 degrees.  This past summer, I was making my own juices using a Nutri-bullet juicer (that thing is FABulous), but by late fall I found the quality of the fruit and veggies I was juicing went way down at the grocery store, so I switched to the Naked Juices.

This journey has had it’s bumps along the way – mostly figuring out what was considered “raw” and where I could get it.  It has not been CHEAP either!  One bag of “raw chips” cost me $8.00! (Won’t be buying another at that price.)  Sashimi is at least $10 a day.  Organic fruit at the grocery store? – more expensive and sometimes a lot worse quality and smaller too.  Sheesh!  I was invited to several parties over the holidays – I had to bring my own dinner (although there were some salads I could eat).  Is it worth it?  I would have to say, over all, yes it is.  I crave the fish every day and I know when I need to drink more water (which I still don’t “savor”, but I don’t mind so much any more).  I was losing about a pound a week without exercise, and I have just started a fitness challenge at the health club, so maybe a few more pounds down and certainly a more muscular physique.  12 weeks – I’ll keep you posted on my progress.  This week (week 1) – weight 155, 35% fat (actually a LOT better than I expected).

Needless to say, this isn’t the diet for everyone.  But I do much better with fewer choices, and I just.feel.better.  Have I been perfect?  No.  Food is my go-to salve when stress is making me crazy, so PERHAPS a western fry or mini kitkat has passed over my lips, just sayin’.  But sugar and frying oils are not my friends any more and my “falls from grace” are short lived, thank goodness!

Is it time for you to examine YOUR diet?  Aspartame, caffeine, sugar-loading and chip bingeing could be affecting your health in more serious ways then just the extra calories or energy boost. You might be surprised at the energy level you can maintain by eliminating the peeks and valleys caused by depending on chemicals, additives and artificial foods.

Have I piqued your curiosity?  If so, you can join me at the sushi bar!
 

Come to Jesus Moment

I have been struggling with my card business – mostly due to the juggling of responsibilities: a full time job, President of the Art Gallery of Fell’s Point, a lackluster jewelry business (both metalsmithing and lampwork beads), love of spinning (fiber), love of machine embroidery (yes, I have a fabulous embroidery machine!), family, an adorable minx of a tuxedo kitty, and the time (mostly lack thereof) in between! It seems like just when I get started on a path, something interrupts and it can be (yes) MONTHS before I get back to it. It does get crazy. So I apologize for the total inconsistency of the posts to my blog!
I have tried to keep my blog mostly card and project related, but I was shocked to see that I have not posted since August!!! (REALLY???).
Sooooo I will be posting more of my life and what inspires me – and hopefully more consistently – in 2016. I am inspired DAILY by what I see – in nature, in my travels, by Pinterest and Facebook (and a few other blogs that I visit regularly). Sometimes that might even result in a card!!!
So here goes…. (drum roll please)…..Starbucks Chair

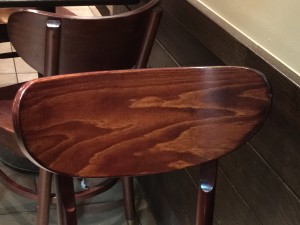
Okay, so perhaps you are a little underwhelmed…. but let me explain….

This is a chair at Starbucks.  This is what has inspired me – look at that wonderful grain, the light and dark areas.  Could this be clouds, a landscape, the ocean, a river?  I could use this in so many ways!  Layer metals for a brooch or pendant for jewelry could be one way.  If this pattern were on a piece of agate or jasper, I would make a cab out of it and set it in jewelry.  For a card,  I could challenge myself to make it monochromatic – all browns using just this color scheme.  Or do a card with clouds featured (stamps or dies).

So this is today’s inspiration!  What do you think?  How does this inspire YOU?

Technique of the week!

I just can’t stop masking images on cards this week!  From making a single layer card look three dimensional to creating complex scenes, I just love masking!  First I stamp my image on plain white copy paper in black ink.  Then I fussy cut around the image, staying as close as I can to the black edge.  I’ll put a dab of snail adhesive on the back just to hold it down for a little while until I have either stamped over it or spritzed a background on the card.   Sometimes I will even stamp and fussy cut several images or even 2 or 3 of the same image (such as a flower) so that I can stamp, mask, stamp, mask and stamp again until my “montage” is complete.   You can even use dies such as clouds or torn paper to create hills or sky scenes.  There is just no end to the creativity!  Here are a few of the cards I did this week – can you figure out what was masked?

Love is Kindness Stampin' Up! Vintage stampOn Gossamer Wings Stampin' Up! vintage stamp set

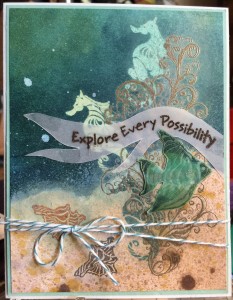
Ocean Commotion Stampin' Up! Vintage stamp set

#TBT On Gossamer Wings

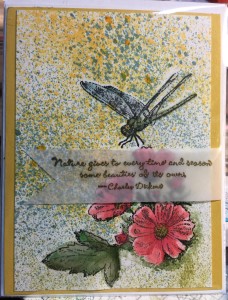
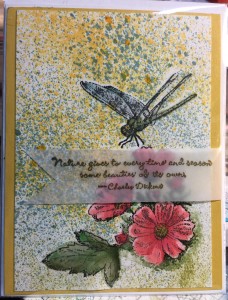
TBT Time again! This time from my “vault” of vintage Stampin’ Up! stamp sets, “On Gossamer Wings” consists of a sweet floral, several lovely butterflies, a dragonfly, and a quote from Charles Dickens.  Other than the banner, which is gold embossed on vellum, the images are all on one layer on my favorite shimmer paper, so there is a subtle glimmer when you move the card in the light.  So pretty!  If you would like this vintage stamp set, message me and we will work out a deal (and you get the card too!)

Stampin' Up!

On Gossamer Wings

Know your true value!

I loved “Dirty Dancing” when it came out, and I have watched it over and over again through the years – it never really gets old, and I know I shed some tears when Patrick Swayze died! There are several iconic quotes from the film, including “Nobody puts Baby in a corner.” (as Johnny pulls Baby from the family table to dance in the final scene). Here’s a link to that final dance scene: https://youtu.be/WpmILPAcRQo.

28 years later, whether you watch this scene or are inspired to watch the entire movie again, the lesson is still relevant, Know Your True Value (or as Johnny says, “Nobody puts Baby in a corner”)!

Intro to Project Life

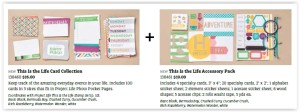
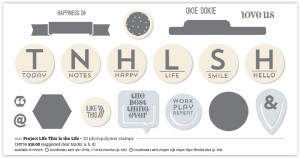
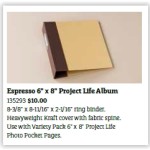
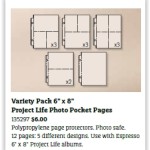
I am so excited to introduce a class to you – Intro to Project Life – Scrapbooking in an afternoon. First of all, I will admit I am NOT a scrapbooker – WAAYYYYY too much time to create Just-that-perfect-page! And even the lure of quick scrapbooking with Project Life faded fast because, once again, toooooo much time (even with pocket pages) to create just-that-perfect-PROJECTLIFE-page! But, never fear the LIGHT has come ON! I have figured out the perfect WAY to do Project Life! …and I have put together a great class to introduce you to the MAGIC!  The class kit includes a 6″x8″ Project Life (PL) binder, 12 6″x8″ assorted PL pocket pages, One of two themed PL sets (stamp set, cards & accessories).  During the class, we will fill ALL 12 pages with cards, embellishments, and your photos.  There is plenty of room in the binder for more pages, if you want to add more later, and there will be plenty left over of the themed cards & accessories for that as well.  All supplies will be provided (coordinating color card stock, inkpads, markers, dies, adhesives) for use during class time.  The class will be held on Saturday, Sept. 5th, from Noon – 3pm at the Art Gallery of Fells Point (1716 Thames St., Baltimore, MD  21231), the cost is $80 per person, and anyone signing up for the class by August 25th will receive a FREE journaling pen!  The fine print: prepayment is required at signup.  No refunds for cancellations or missing the class – the kit and all class handouts will be provided to you after the class is held.  Message or email me to register for the class.  Payment can be sent via Paypal or I can email a Square invoice.  Registration will be confirmed when payment is completed.

Theme Choices:

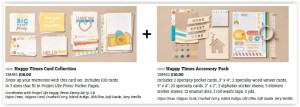
Happy Times

Happy Times Cards & Acces.

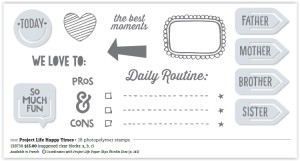
Happy Times Stamp Set

Happy Times Stamp Set

This is the Life Card and Access. Packs

This is the Life Card and Access.

This is the Life Stamp Set

This is the Life Stamp Set

Project Life 6x8 Album

6×8 Album


Journaling Pen GIFT for Early Registration

Project Life 6x8 Asst Pocket Pages

Project Life 6×8 Asst Pocket Pages