Category Archives: Cards

#TBT I am

All-occasion card

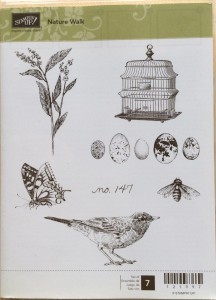
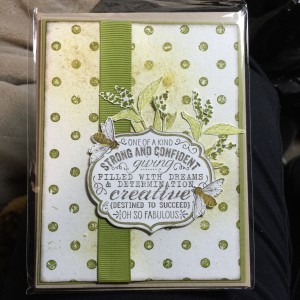
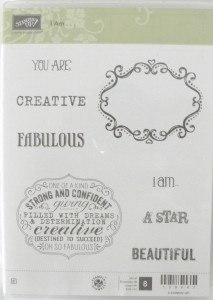
“I Am” was a stamp set that was given to all attendees to the 2012 Stampin’ Up Convention, the first one (and only, so far) that I attended.  It was “oh so fabulous!” and just a bit overwhelming.  At any rate, I was inspired to make this carI am, Oh so Fabulous, Creative, a Star, Beautifuld, which combined the “I Am” stamp, elements from “Nature’s Walk”,Nature Walk, Bee, Plant, Bird, Birdhouse

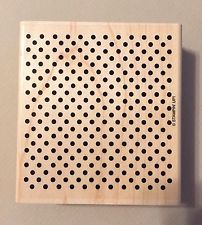
and the “Dot Dot Dot background stamp.


Dots, Dot Background

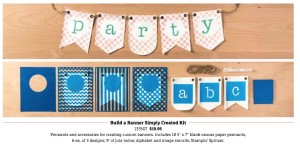
All three stamps have been retired, and usually for #TBT I show some current products.  So, while you can’t create this particular card, there are current alternatives for some of the elements.  For instance, a different way to get the background dots is to use a stencil, and there is a great stencil in the “Build a Banner Simply Created Kit” in the annual catalog.  Build a  Banner, Dots Stencil


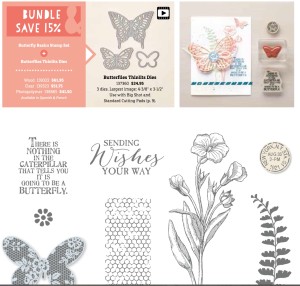
The 2015 Occasions “mini” Catalog has butterfly thinlits and a great nature stamp to buy as a bundle for 15% off!  Substitute a “3D” butterfly for the bee.

Butterfly Thinlits, Butterfly

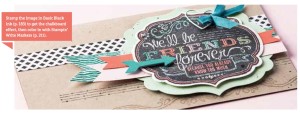
And try the latest “chalkboard” technique by stamping in black ink on white paper.  You can even use your watercolor markers to highlight some areas in color.

Friends Forever, Chalkboard, Markers


So use your vintage stamps or to try something new – message me to get your copy of the latest catalogs or order one of the selections above! #TBT I Am is “oh so fabulous” in more ways than one!!!

#TBT Googly Ghouls Boooo Card!

Well we are NEARLY to October, so what could be better than a CREEPY Halloween Card!  Now’s the time to claim your 2013 VINTAGE Googly Ghouls stamp set.  Don’t think I can give up the spider web folder, though!

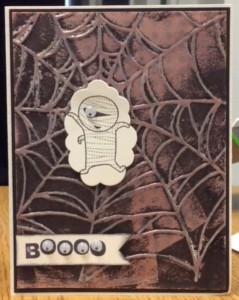
Boooo CardHere’s the card from the Googly Ghouls 2013 stamp set (retired already!).

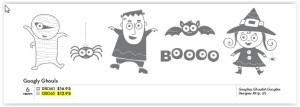
Lots of other ways you can do the card using the many images in the stamp set:

2013 Googly Ghouls


A hint for the techniques – clear embossing, vellum and black ink spritzing!


Here’s how #TBT works!  If you want this wonderful vintage stamp set, you may purchase it for $9.00 plus shipping. (US purchases only please).  You will receive the stamp set and the card!  IF you purchase the stamp set AND place an order (www.mystampalooza.stampinup.net) for at least $30 of merchandise, you will receive (besides your order of awesome Stampin’ Up products), the vintage stamp set, handmade card and envelope, a selection of vintage Stampin’ Up embellishments (googly eyes Googlie Eyesand 4 vellum embossed spiderwebs) AND the instructions for making the card above!  Please email or comment on this post if you are interested in one or the other!  This is a limited time offer, and you have until midnight next Thursday – then there will be a different, wonderful, vintage stamp featured!

Listed below are the current Stampin’ Up products used for this card.

101856 White Vellum (20 sheets) $6.50
102316 Naturals White Cardstock (40 sheets) $7.50
121045 Basic Black Cardstock (24 sheets) $6.95
101910 Shimmery White Cardstock (10 sheets) $7.95
109130 Clear Embossing Powder $4.95
126185 Stampin’ Spritzer $2.95
133773 Sponge Daubers (5) $4.95
102283 Versamark Inkpad $7.50
126980 Basic Black Inkpad $5.95
102512 Basic Black Ink Refill $2.95
107301 Whisper White Envelopes (40) $6.50
132172 Envelope Liner Framelits $26.95
132968 Word Bubbles Framelits $24.95
104332 Snail Adhesive $6.95
104430 Stampin’ Dimensionals $3.95
118485 Clear Mount Block D $8.50
113439 Big Shot Die Cutting (& Embossing) Machine $99.95
129053 Heat Tool $29.95

#TBT Inspired by Nature

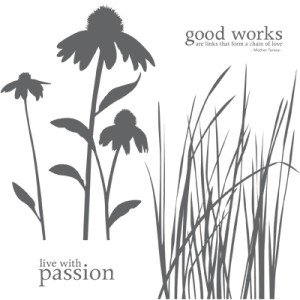
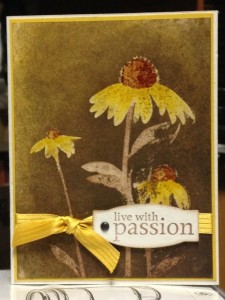
Welcome to Week Two of Throw Back Thursday!  This week’s stamp is “Inspired by Nature”, a stamp set that was released in 2010.  This is a BIG stamp, with the large daisies on one side of the block and blades of grass on the other side.  So versatile!  The two sentiments are also mounted back to back on a wooden block.

Inspired by Nature stamp set

Inspired by Nature stamp set


Inspired by Nature card

Inspired by Nature card

The fun part about creating this card was seeing the daisies emerge after embossing the images and then spritzing the background.  Smooth that spritzing around with a baby wipe or paper towel, and the crisp outlines of the embossing just POP!

The other “secret” is that the new Stampin’ Up Blendabilities will be permanent on TOP of the embossing, so you can add more color on top to make it look even more 3D!


Here’s how #TBT works!  If you want this wonderful vintage stamp set, you may purchase it for $13.00 plus shipping. (US purchases only please).  You will receive the stamp set and the card!  IF you purchase the card AND place an order (www.mystampalooza.stampinup.net) for at least $30 of merchandise, you will receive (besides your order of awesome Stampin’ Up products), the vintage stamp set, handmade card and envelope, a selection of vintage Stampin’ Up embellishments AND the instructions for making the card above!  Please email or comment on this post if you are interested in one or the other!  This is a limited time offer, and you have until midnight next Thursday – then there will be a different, wonderful, vintage stamp featured!

Listed below are the current Stampin’ Up products used for this card.  As you can see, I like to use a LOT of products.  But that is because I HAVE a lot of products, and that is because I LOVE Stampin’ Up and the fact that all the colors MATCH!  You can certainly make this card beautiful with fewer choices. 😉

135707 Project Life Cards & Labels Framelits $24.95
130998 Daffodil Delight Stampin’ Blendabilities Markers $11.95
129370 Skin Tone Assortment Stampin’ Blendabilities Markers $22.95
109130 Clear Embossing Powder $4.95
118772 Vanilla Shimmer Smooch Spritz $4.95
102283 Versa Mark Stamp Pad $7.50
130934 Neutrals Candy Dots $5.95
132293 Candy Dots Brad Bases $2.95
133671 Hello Honey 3/8″ Stitched Satin Ribbon $8.95
107297 Crumb Cake Medium Envelopes $6.50
101849 Naturals Ivory Cardstock $7.50
101910 Shimmery White Cardstock $7.95
133678 Hello Honey Cardstock $6.95
133643 Hello Honey Stamp Pad $5.95
133649 Hello Honey Ink Refill $2.95
129679 Chocolate Chip Stamp Pad $5.95
101065 Chocolate Chip Ink Refill $2.95
104332 Snail Adhesive $6.95
104430 Stampin’ Dimensionals $3.95

#TBT (Throw Back Thursday)

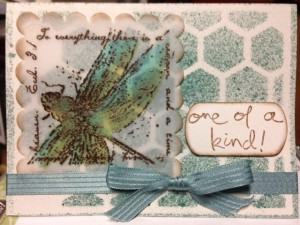
I LOVE Facebook, but every once in a while some of the abbreviations really “throw” me, as this one did, for MONTHS, until finally I saw the actual full title!  Now the back story is that I have, literally, HUNDREDS of vintage Stampin’ Up stamp sets.  When I started this wild ride (i.e. obsession -uh huh, I admit it!), I was consumed by all the stamps in the older catalogs that I DID NOT HAVE, and lo and behold, they were available on EBAY!  Since then I have SO MANY STAMP SETS I could not even go through them all if I stamped cards EVERY DAY!  (and I do try!).  So I have decided that these stamps will find NEW homes!  Some may go back to EBAY, but some I really like will be featured on THROW BACK THURSDAY!  Today I’ve created a card using two vintage stamp sets with current Stampin’ Up products:  “Measure of a Life” (2006) and “Mixed Greetings” (2005).  Here’s the card:Dragonfly #TBT

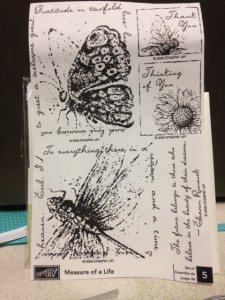
…and here are the two stamp sets:


Measure of a Life

Measure of a Life 2006


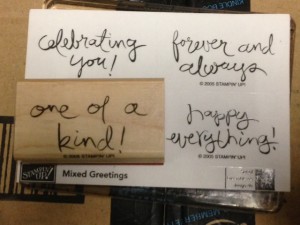
and


Mixed Greetings

Mixed Greetings 2005


The way this will work is if you like these stamp sets, which have been officially retired by Stampin’ Up, you can purchase them, for the price stated below,  AND receive the card for FREE! (US Orders only, please)

If you purchase the stamp sets AND place an order of $30 or more of Stampin’ Up products from my website

(www.mystampalooza.stampinup.net), I’ll ship these lovelies to you for FREE, along with the card AND a selection of vintage embellishments, because once you get these stamps, you will be INSPIRED to make a bunch of cards.  Heck, I’ll even throw in the techniques I used to make this card (hint: there are more than one!).

The two stamp sets will be sold for $15 (total).  S/H will be $5.25 (Priority Mail Small Flat Rate Box)

Here are all the supplies used in this card:

126974 – Early Espresso Classic Stampin Pad $5.95
130136 – Coastal Cabana Designer Series Paper (40 sheets) $21.95
101856 – White Vellum (20 sheets) $6.50
102316 – Naturals White Card Stock (40 sheets) $7.50
133672 – Lost Lagoon Satin Stripe Ribbon (10 yards) $6.95
107297 – Crumb Cake Medium Envelopes (40 envelopes) $6.50
104332 – Snail Adhesive $6.50
103683 – Glue Dots $3.95
104430 – Stampin Dimensionals (300) $3.95
104294 – Sticky Strip $6.95
133672 – Lost Lagoon Satin Stripe Ribbon (10 yards) $6.95
126895 – Stampin Spritzer $2.95
133773 – Sponge Daubers (5) $4.95
102283 – Versaamark Inkpad $7.50
131000 – Coastal Cabana Stmpin’ Blendabilities Markers (3 Markers) $11.95
130998 – Daffodil Delight Stampin’ Blendabilities Markers (3 Markers) $11.95
128980 – Early Espresso Stampin’ Emboss Powder $4.95
119882 – Scallop Edge Border Punch $15.95
119859 – Extra-Large Oval Punch $16.95 (oops, the punch used on the card is retired, but this one is current and would work also!)
132965 – Hexagon Hive Thinlit $24.95

Bleach! Technique of the Week!

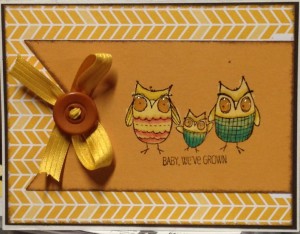
One of my favorite “inks” actually removes color – that’s Bleach!  This is more effective on medium – dark solid color card stock.  I usually stamp an image with versamark and then emboss with clear or colored embossing powder.  Then I put some bleach in a small container and “paint” with a small brush over the image inside the embossing.  This keeps the bleach effect from spreading outside the lines.  Very shortly, the color of the paper bleaches out to a lighter color – sometimes one you don’t expect!  After the bleach dries thoroughly (you can use a embossing/heat gun to dry if you are in a hurry), go back and ink up the resulting lightened image with markers.   There are a couple other methods to use bleach in stamping cards, but I’ll save that for another week ;-).  Here’s my sample, using a card from a Project Life pack as background, and the “Baby, We’ve Grown” stamp set.  I’ve added a few dots of Crystal Effects over the Owl Eyes!

Bleach Baby

To order any of these products, be sure to shop at www.mystampalooza.stampinup.net.  To join my mailing list and subscribe to my NEW monthly newsletter, Stampin’ Nooz, enter your name and email address to the form on the right!

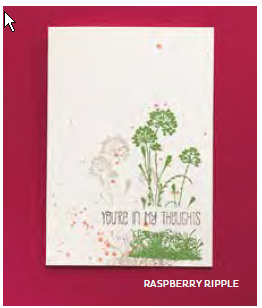
Serene Silhouettes Card

This a simple, fun card straight out of our 2013-2014 Stampin Up Catalog!

Stamp set: Serene Silhouettes

Sentiment set: A Dozen Thoughts

Inkpads: Crumb Cake, Gumball Green, Basic Black

Other: Raspberry Ripple Reinker, Aqua Painter

Technique: Masking

Lots of options to make card sets for gifts by switching out the sentiments or stamp images!

Download a PDF of the supplies and instructions here:Serene Silhouettes Card

Fiddley Level = 11! (Day 6)

Spidey #2 – on the Label…

I inked the spider image from the “Spider Cider” stamp in the “Monster Munchies” set with Basic Black and Old Olive markers and stamped him on the corner of the “Happy Halloween” Label.  I also punched a 1/16″ circle on the inside of the “O” in Halloween (must have been AFTER I took this picture!).   I fed the top end of the fishing line with SPIDEY attached through that hole and adhered a dimensional over top. 

I punched a 1/16″ circle at each end of the label, and inserted old olive glimmer brads.

I added dimensionals at the four corners and attached to the top of the card. 

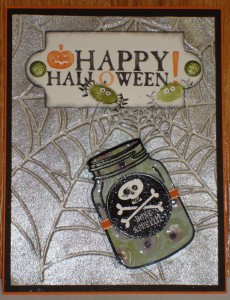
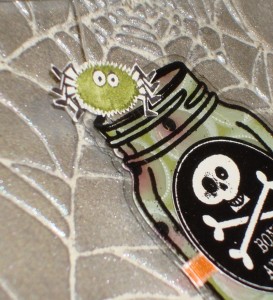
Now Spidey can climb up and down from his web to the jar of eyeballs!  CREEPY, Yes?

Here’s another look at the final card:

and, a video of Mr. Spidey doing his daily exercise!  <ed. sorry, couldn’t figure out how to get it embedded!>


Until then…Keep Calm and Find Yourself a Rubber Stamp!

Fiddley Level = 11! (Day 5)

A clear jar – challenge! – Window Sheet! Challenge solved! 

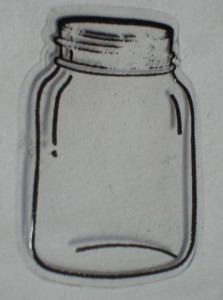
As you can see, I have stamped the jar from the “Perfectly Preserved” stamp set in versamark ink onto a piece of our awesome window sheet.  Then I embossed with black embossing powder.  If you have our NEW heat tool, there are 2 settings, and you can emboss on the low setting without melting the window sheet.  I CAREFULLY embossed with the old heat gun (only one setting – high!), by keeping the gun moving back and forth across the embossed area until all powder has melted. 

Then I cut the shape out with the jar from the “Cannery Set” framelits.  After this was done, I didn’t like the curved line at the bottom of the jar – so I just scraped it off with my fingernail!  In a perfect world, I would have masked the stamp with tape in that area when I inked it with the versamark, or removed the embossing powder with my fingernail before I embossed the jar, but the adhoc approach worked, thank goodness!
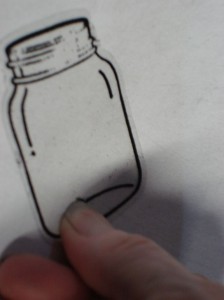
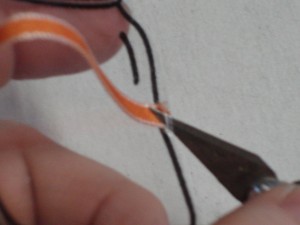
Next, I cut a slit in the plastic, right outside the jar line, to insert the ribbon.  I used my craft knife to “grab” the ribbon and pull it through the slit.  Since the Framelit cuts about 1/16″ outside of the stamp image, there is just enough room to make the cut.  I pulled both ends of the ribbon so that it sat flat on the “jar”.
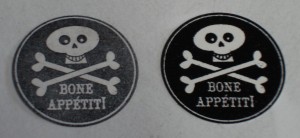
For the label, I tried stamping it in basic black on the shimmer paper (my favorite label material, since it is a little stiffer than the whisper white paper).  That was not quite dark enough for me, so I tried it with versamark and black embossing powder, and that result was PERFECT!
I snailed the back and attached it right over the ribbon. 

Now it is time to attach the “eyeball” layer.  I adhered two glue dots to the back of the clear jar, right behind the label, so you cannot see them from the front.  Then I snailed the back of the “eyeball” layer just across the center where the ribbon would go, and wrapped the ribbon around that layer.  

Now I punched a 1/16″ hole through both layers of the jar (window sheet & eyeball paper), near the top of the jar (see example).  This is for the spider’s fishing line!  Feed the end of the fishing line through the hole (make sure SPIDEY is still attached!) and add a dimensional over the end.  I adhered several more dimensionals to the back of the “eyeball” layer, and pressed it down to the spiderweb card front. 
I think we are neeeearrrly finished!  Tune in for tomorrow’s wrap up!

Until then…Keep Calm and Find Yourself a Rubber Stamp!
Fiddley Level = 11! (Day 4)

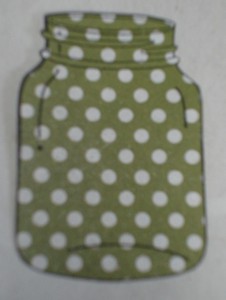
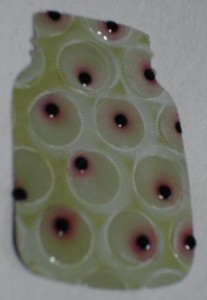
My Jar of “eyeballs” started with the large white circles side of the Old Olive sheet of Polka Dot Parade DSP.   I  stamped the other side (white polka dots) in basic black with the jar stamp from Perfectly Preserved, and cut it close to the outside stamped line (fussy cut).

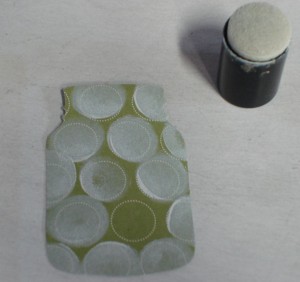
I flipped it over to the other side and with a sponge dauber and whisper white ink, I pressed it into each large circle, with a little twist.

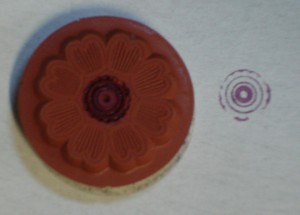
Next, I had to find a “retina” image for the eyeball, basically a few small concentric circles.  There is a small flower in the “Lacey & Lovely” stamp set that has the perfect image:

I inked the center with Rich Razzleberry marker and pressed the stamp with my fingers (Yep, no clear block!)  Using this method, I stamped the image on all of the white circles, sometimes in the center, sometimes near the edges.

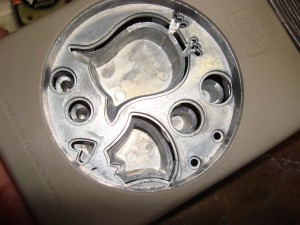
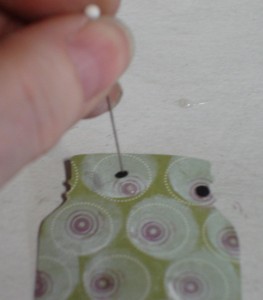
 Now I had to find a black center for the eye!  The smallest punched dot I could find was from the Owl Punch!  (see those teeeeeny tiny dots at the bottom of the picture?)  I squeezed a dot of crystal effects to the center of each retina and, using a straight pin to pick up the black dot, pressed it into the crystal effects.  I set this aside to dry for a few minutes.

The final step for this part of the jar is to squeeze a larger dot of crystal effects over each eyeball, spreading to the edge of each circle.  This has to dry for at least 8 hours – preferably overnight.  I hope these look like eyeballs as much to you as they do to me!

Next up: A Jar and a Label (Day 5)!


Until then…Keep Calm and Find Yourself a Rubber Stamp!
Fiddley Level = 11! (Day 3)

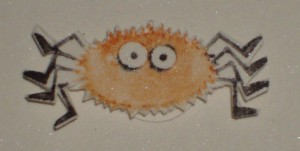
Spooky Spider!!

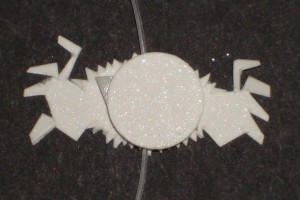
This little guy was “fussy cut” and then prepared to slide up and down on his own spider web.

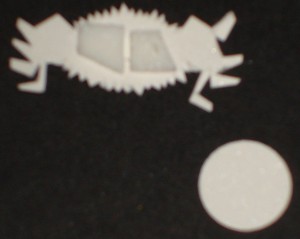
The view from the back shows the two bits of dimensionals that have been placed so there is a slot in between for the web (fishing line).  A small circle was punched and stuck to the dimensionals:


 The fishing line will feed through the slot so spidey can make his way up and down it!


Next Step: Jar of Eyeballs (Day 4)

Until then…Keep Calm and Find Yourself a Rubber Stamp!