Category Archives: Cards

Fiddley Level = 11! (Day 2)

LABEL MAGIC!

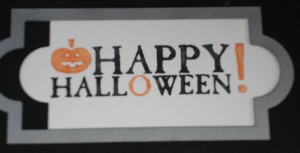
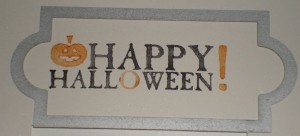
We have a lovely label die in the Apothecary Accents Framelets collection that is a long rectangle with two “bumps” on each end perfect for brads or securing ribbon through holes. It is a bit long for some sentiments, and I found I can get it the perfect length using this technique.:

First I stamp my image and then center it vertically under the die. I shift the die close to the left side of the stamped image and run it through the Big Shot. With the label still in the die, I shift the die to the right side of the image and run it through the Big Shot again. Now I have the perfect length for the sentiment!

Next up: Day 3 – Spooky Spider!

 Until then…Keep Calm and Find Yourself a Rubber Stamp!

Fiddley level = 11! (Day 1)

 Halloween always brings out the creative juices!  There used to be costumes made from scratch, much partying (and recovery time)…but I digress… that was MANY moons ago and these days, paper, ink and stamps satisfy my creative muse instead!

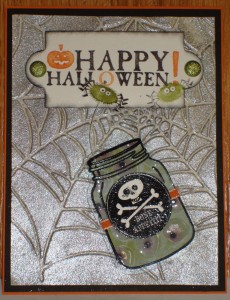
I had the opportunity to participate in a card-front swap of stamp sets in our new Holiday Mini catalog.  The stamp set I chose is called “Monster Munchies” and by the time the card came together, I had 4 stamp sets, an embossing folder, 2 sets of framelits, and flotsom from oodles of techniques (some I think I made up!) spread across my stampin’ table!  If you’d like to follow along with the process, I’ve broken it up into several posts – this was a looooong process!

Starting with the spider web layer, ink the spider web embossing folder with versamark ink, but only on the raised side.  After running this through the Big Shot, cover the paper with clear embossing powder, and gently brush off all the excess powder from the raised surface, leaving the powder in the spider web cavities.  Melt with the heat gun.  Spray with Silver Foil Smooch Spritz.   (Smooch always creates an amazing effect – and the silver is impressive!)  The embossing powder acts as a resist, and remains shiny and white against the silver background.

Next up: Day 2 – creating the label…

Until then…Keep Calm and Find Yourself a Rubber Stamp!


Howlstooth DSP – Thank you Stampin’ Up!!!

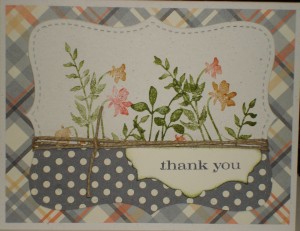
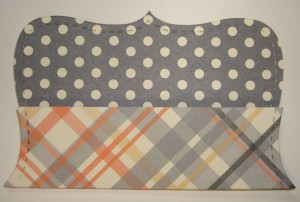
Here’s the scenerio:  Good friend has surgery.  I am at convention and this slips my mind (well, he did not say it was MAJOR surgery, in my defense!).  Two weeks go by (er, FLEW by) and I call.  Uh oh.  I am in.the.DOGHOUSE!  No get well card!  (…and we are getting together tonight for a concert)…hmmm two problems – manly card AND get well card – due in ONE HOUR!  YIKES!  Well, Stampin’  Up to the rescue!   A quick search online for a design to CASE, Check!  Search for appropriate stamps… Check!  Manly colors/design….hmmmmmm…. aHA!  Howlstooth and Herringbone DSP – a give-away from convention and in the new Holiday Mini Catalog.  Stampin Up has made all the color choices for me by providing Designer Series Paper collections with coordinating colors, designs, etc.!  I was even able to use the same page of paper, since the plaid pattern was on one side and the dots on the other, as you can see from the folded sample on the left!  Lovely soft grays and oranges – good for guys!  Love the plaid and dots together.  I found perfect flowers with Just Believe set from the 2012 main catalogue (released July 1st).   Soooo….. card in one hour?  CHECK!

You may notice this card has “thank you”, not “get well soon”.  That get well card went out the door so fast there was not time for a photo!  Ooopsy!  The good news is that I think this design works just as well for a thank you, birthday, or “thinking of you”!  (Did I say how much I LOVE this paper???)

Until next time…Keep Calm and Find Yourself a Rubber Stamp!

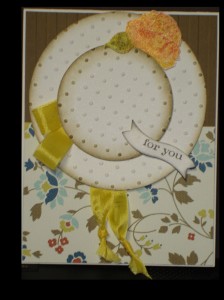
Do 2 circles make a hat?

Recently I made a card for a challenge, and the “sketch” involved 2 concentric circles.  After I finished the card, I realized it looked very much like a hat!  So I created another one in which my intention WAS to create a hat, or bonnet.  I’ve used the largest circle from the Sizzix dies (3 1/2″ circle) and the 2 1/2″ circle punch, then run the circles through the big shot with the Perfect Polka Dots embossing folder.  Both circles have been sponge-daubed (is that a word?) with crumb cake.  The background is Soft Suede (run through the Big Shot with the Stripes embossing folder), and the bottom half is one of the designs from the new Comfort Cafe DSP.  The ribbon is 1/2″ Daffodil Delight Seam Binding, and the rose is from Papaya Collage (fussy cut!).  More about the rose, I used the Daffodil Delight and Calypso Coral markers to ink the stamp (and old olive for the leaf), then used Daffodil Delight to go back and fill in the “white”areas of the rose, and the blender pen to “mush” the colors together so that they looked more natural.  I spritzed the rose with gold smooch (how could I NOT? – it needed a little bling!).  The sentiment is from Just Believe and the label is from the new bitty banners framelits.  I do love the Shimmer Paper, and find it is stiffer than Whisper White for embellishments, so the circles and the banner are all cut from Shimmer Paper.

So what do you think?  Do I have a hat?;-)

Until next timeKeep Calm and Find Yourself a Rubber Stamp!

Manly Smooch Final

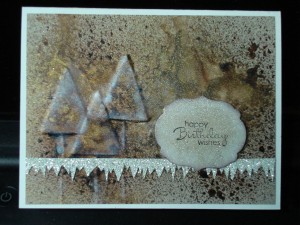
Here’s the final card (which morphed from thank you to birthday).  What do you think?  Too “cartoony”?  I used Whisper White to sponge daub some white at the edges of the trees and tree trunks.  Looks like a little snow has fallen.  The gold and log cabin smooch spritz goes its own way on every card, and I like the splatters and impressionistic effect.  You don’t need to be an artist to make this card look GREAT!

Until tomorrow…and new adventures…Keep Calm and Find Yourself a Rubber Stamp!

Manly Smooch

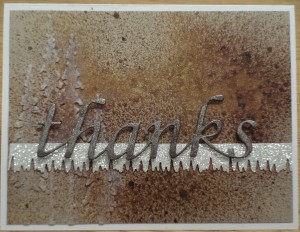
I needed a “manly” card for a thank you, and was inspired by this:

The “thanks” sentiment and the silver icicles are die cuts, and the embossing folder is Sizzix, but not one exclusive to Stampin’ Up.

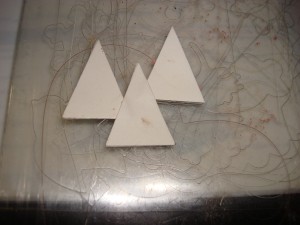
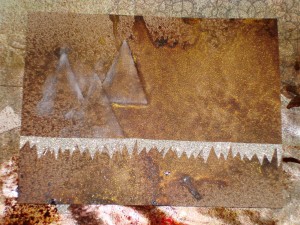
To replicate the fir trees, I punched the cardboard layer included in Designer Series Paper Packs with the Petite Penants Builder Punch, cutting 9 triangles.  I “snailed” 3 triangle shapes layering 2, 3 and 4 triangles and used a bit of snail to glue them to a Big Shot plate as shown here.  I placed a crumb cake layer over the “trees” and rolled it through.  My own exclusive embossing plate!!!  after spritzing with log cabin and gold smooch and snipping silver glimmer paper and into a strip of icicles, I ended up with this:

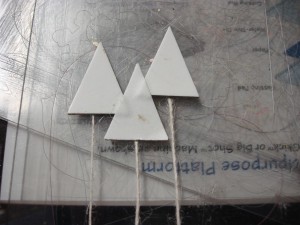
I am not really sure the triangles “read” as trees, so I added some twine to the big shot plate for tree trucks:

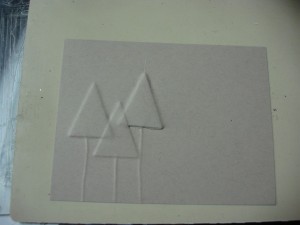
Another try at embossing:

This looks better!  Check back tomorrow for the final product!

Until then…Keep Calm and Find Yourself a Rubber Stamp!

Smooch Spritz Manhattan Floral

 Baby needs more Smooch Spritz!

I am smitten by the effects of using not just one Smooch color but overlapping 2 or even 3 colors.  The gold smooch adds the most amazing effects to the other colors and your card! 

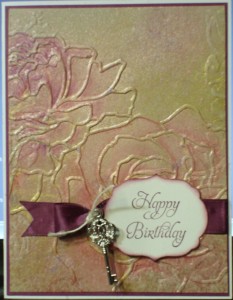
Believe it or not, the base color for this embosssed layer is crumb cake!  I embossed with Manhattan Flower, then smooched Blushing Bride, then Gold, and dried it with the embossing gun.  It is difficult to photograph the glitzy appearance the gold adds. 

I used red and magenta Stampin’ Up watercolor pencils in the shadow areas of each rose, and followed with lighter shades of each color.  Then I used a damp paintbrush to soften and blend the colors. 

The Rich Razzleberry satin ribbon is actually retired, but I liked it better than any of the current ribbons, so on it went!  I added a trinket key (so cute) with some twine, and cut the smallest Label Framelit from white shimmer paper.  I really like the simple loop of the ribbon rather than a full bow – just enough to be elegant and no bow-tieing challenge!

More Smooch adventures on the way….

so until next time… Keep Calm and Find Yourself a Rubber Stamp!

Another Sweet Floral

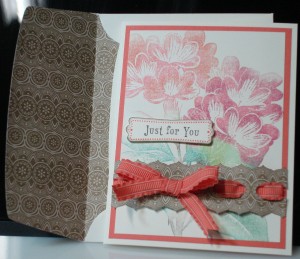
Stampin' Up, Sweet FloralThe original material that I saw used to make a multicolor stamp pad is “Cut-n-Dry” Felt.  This image was the result of using that method.  The density of the felt vs the textured surface of the paper towel that I used in an earlier post did make a big difference in the detail of the flowers, but I still like the texture from the paper towel method too!

I am continuing the experiments with strips of the Twitterpated Designer Series Paper, and Like this one as well.  I just cut carefully along the pattern line to create the decorative edge.  It is the same paper as the envelope liner.  Can you pick out the part that I used? 😉

I do like the sentiment font and the sweet pattern around it (from “Tea Shoppe” – 2012 Occasions Mini Catalog) – they fit perfectly in the Modern Label punch.

Until next time…Keep Calm and Find Yourself a Rubber Stamp!

Doily Just for You

With some cards, I have the idea and it is only a hop, skip & jump (or cut, stamp and glue) to the final card.

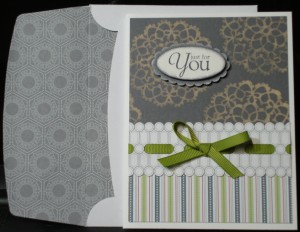
Other times, it.is.a.process!  When I am searching for my muse, it can come from leftovers on my bench, a color combination that is particularly fetching, a paper pattern or even a tool or supply that I have been wanting to experiment with.  With this card it was almost all of the above!

I revisited the bleach technique… this has such a “batik” look about it.  Then I had a little exploration with one of the Twitterpated paper patterns – resulting in the wide strip the ribbon is woven through.  Me likeeeeee! (The details about this are in yesterday’s post…) The striped pattern and the envelope liner are also patterns in the Twitterpated collection, so while they are quite different patterns, the basic gray color in all of them pulls this into a cohesive design.

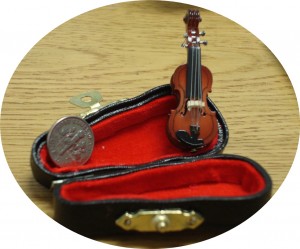
The rest of the story…. This card is headed out the door.  One of my cousins (well, all of them in this branch of the family tree) is very musical and plays the fiddle in a local band.  I LOVE to shop on Etsy (www.etsy.com) and came across this little gem from a gal in Germany (her shop is “miniblings“)!  How adorable is this?  The violin case is just perfect.  The violin is actually a brooch (pin on the back).  My ‘cuz will be so surprised!! Love it!

 Until next timeKeep Calm and Find Yourself a Rubber Stamp!


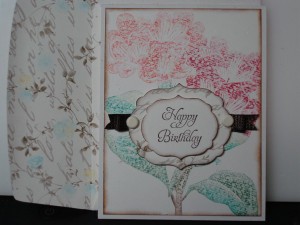
Sweet Floral Happy Birthday

I confess, I love to surf the ‘net!  I get tons of inspiration from OPB (Other Peoples’ Blogs) 😉  Probably the most fun is seeing if I can recreate a design, technique or whatever catches my eye with Stampin’ Up products.  In this case, I think it came out BETTER than any of the samples that I saw out there in bloggerland.

In the samples that I saw, they used a stamping product that was a dense foam with the foam on one side and then a fabric of some kind covering the foam on the other side.  This “fabric” side is the “business” side of the “stamp”, kind of like a scrubbie has a sponge side and an abrasive side.  Taking a leap from my most recent card-venture, the bleach technique, I thought, why not a paper towel pad again?  Soooo, folding up my towel, I started the process.

First you ink up your stamp with Black Staz-On ink (you don’t want a water-based image that will bleed into the colors that follow).  Stamp the black image onto the paper pad.  Then it is reinker time!  I used no less than 11 reinkers: 5 shades of green for the leaves, 2 shades of brown for the stems, 4 shades of pink for the flowers.  Here’s the fun part!  just squeeze the reinker over the area that you want colored.  It doesn’t even have to be precise!  In fact, there is no way you can keep your ink from spreading out anyway as you can see from the photo here. 
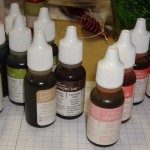
The magic happens when you ink your stamp from this paper stamp pad! The shading is really life-like!

What I did not expect (DUH!) is the texture from the paper towel.  It is interesting in a graphics kind of way and thought provoking (as in “how did you do that???”).  You could experiment with different surfaces such as gauze, tissue paper, or a finely woven cotton, either AS a stamping pad or on TOP of your paper pad.   (ed. –  or several layers of felt.)

The serendipity with this project was the sweet pattern from Attic Boutique Designer Series Paper (2012 Occasions Mini Catalog).  The colors were PERFECT! 

So find one of your stamps that lends itself to multiple ink colors and try this technique!  You should be able to get at least 2 stampings from the “pad”, and even add more ink as it dries out. 

 Until next time…Keep Calm and Find Yourself a Rubber Stamp!