Category Archives: Crafty Techniques

Bordering on Romance Thank You

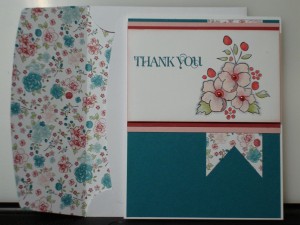
Recently, there was a blog tour on the Exclusive Stampin’ Up Demonstrator site, SUDSOL.  One of the cards in particular using the Bordering On Romance set and Twitterpated Designer Series Paper, “called” to me!  Both the stamp set and paper are available in the 2012 Occasions Mini Catalog.  The original design (Thanks, Cristyne!) is here.

 There are lots of “crafty” details to this card that make it a “WOW”! 

The first is the coloring technique – you could use Stampin’ Up’s great markers, watercolor pencils, watercolor crayons, or even ink up a brush from the stamp pad or reinker. 

If you are using any of the water-based inks to fill in the flowers, then you will need to stamp the image with black Staz-on so the ink doesn’t run. 

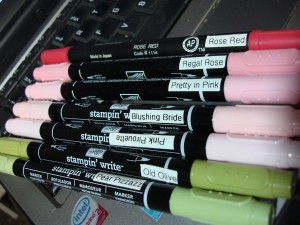
These are the SU markers that I used on the sample below. 
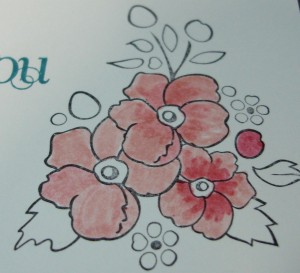
To illustrate the steps, I used Blushing Bride on all 3 flowers, then Pretty In Pink just on the part of the petals nearest the center for the top flower and right-hand flower, then finally, Regal Rose on the right-hand flower.  You can see the color difference of the layering effect – the little circle on the far right is Regal Rose by itself.

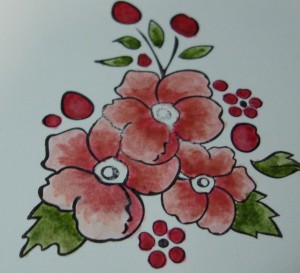
After the Regal Rose step, I went back with Pink Pirouette and tried to blend the layers a little better.  To get the darker ink off the brush tip of Pink Pirouette, I would just swipe it against my finger or scrap paper as I went along.  In retrospect, I could have used a damp Q-Tip to blend the colors a little more.  Here is the final product:
Tomorrow:  the rest of the story – pink pearls and envelope envy!

Until then…Keep Calm and Find Yourself a Rubber Stamp!

Sweeties Valentine Card

…and you thought I would stop at the Sweetie HEARTS????

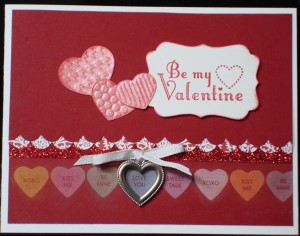
Let’s see…. I managed to use 2 punches, an embosslit, glimmer paper, Shimmer Spritz, sponge dauber, Designer Series Paper, Ribbon AND a Trinket Heart!

You could actually call this card GREEN because I used up so many bits and pieces that were left on my bench after all the other V-day cards had been worked out!

I have been wanting to try out the trinket hearts and keys, so when I pulled this heart out, it matched the size of the Sweetie heart PERFECTLY!  This would be so much fun as a SLIDER or wheel card!  Punch out the heart under the trinket and have the sweetie hearts slide back and forth or the wheel turn so different Sweetie Sentiments show through the heart!   What do YOU think???

Do-Overs:  If I were to do this card AGAIN, I would punch the red glimmer paper with the scallop punch also and offset the scallops as I did with the DSP and cherry cobbler layers.

Hint: To offset the scallops perfectly, cut your layers a little larger than the card.  After punching the scallop borders, line them up and trim the excess edges to the size of the base layer.

Until next time…Keep Calm and Find Yourself a Rubber Stamp!
Sweeties and chalk

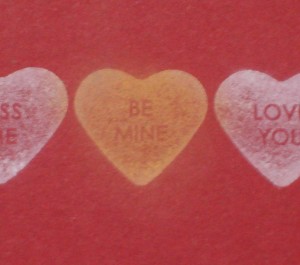
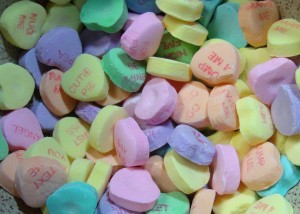
Remember these?  When I discovered the “Candy Conversations” stamp in the 2012 Occasions Mini Catalog, I knew EXACTLY what I wanted to do – Chalk Technique!

For this method, you need to ink your stamp with Whisper White Craft Ink, and stamp (usually) on a darker paper.  You will need  some kind of chalk “media” – Stampin’ Up has a full palette of our signature colors in chalk, so you can match every one!

Here’s the stamp inked up.  Notice I have managed to just ink the stamp along the edge of the stamp pad to keep ink off of the sentiment.  You should wipe any boo-boos off before you stamp.

Here is the stamped image on our darkest red card stock, cherry cobbler.  The nice thing about the craft ink is that it stays “wet” a little longer, so you have a minute or so to choose your colors and chalk it up.

I chalked a different color on each heart for my card, but you could just color one and use your embossing gun to dry the rest of the chalk ink for a single “pop” of color.  The inportant tip here is to make sure you have plenty of chalk covering the ink.

The final step is to wipe off the excess chalk with a soft cloth.


Curious about the card yet?  The final details tomorrow!

Until next time…Keep Calm and Find Yourself a Rubber Stamp!
Dazzling Details meets Jelly Bean Brads!

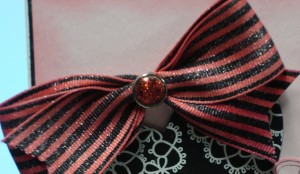
Onto the BRAD!!!  Well, a glitter bow needs a glitter brad, right?

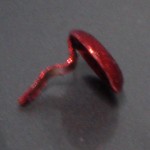
We have Stampin’ Up absolutely gorgeous glitter brads in many colors, so I proceeded to ATTEMPT crimping this bow with a red one.  Sadly, at least 4 brads later, they all looked like this:

Not good.  Clearly the brad is just too small to stand up to the bending and shaping required to get it around the bow. 

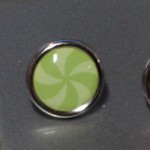
Plan B.  When I looked over the available (current catalogs) brads, I realized that the Occasions Mini had larger ones – the Jelly Bean Brads featured on page 35 of the 2012 Occasions Mini Catalog! 

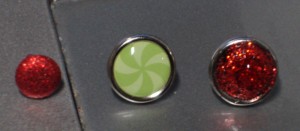
We also have our first “glitter glue”, called Dazzling Details (cherry cobbler color), available in the Occasions Mini.  AH-HA!  By squeezing the Dazzling Details over the top of the brad and spreading it around with the tip of the container, I was able to get a goodly glob of it on the jelly bean brad.  It did take quite a bit of drying time, so you must be patient, or not plan to use the brad until the next day.  The “glob” compresses down to the top of the brad once dry, so don’t worry too much about your mound-o’glitter.  I did find that once it dried, it was VERY hard to remove from the silver ring around the brad, so use your fingernail or a toothpick to wipe off the silver ring BEFORE it dries. 😉

Until next time…Keep Calm and Find Yourself a Rubber Stamp!
Faux Bow

Remember this bow?

It was the final result of a day-long experimentation with re-inkers, craft re-inkers, contraband re-inkers, smooch spritz and shimmer paint.  After nearly permanently red fingers, bleeding too much ink (bleeding used both as a verb and expletive deleted here…), and a whole BOTTLE of Champagne Shimmer, the easiest (and SU-product) method turned out to be sponging on the shimmer, dry with heat gun then follow with real red marker and a final dry with the heat gun.

Faux Bow, you say?  Why yes, glad you noticed! Cut 13 inches of the (inked) ribbon and lay flat on the table.  Fold the two ends in over each other, so the layers are evenly in thirds.  Pinch in the middle and fold the brad ends AROUND the ribbon, crossing over in back, and press as flat as possible.  Gently pull the end on the right down from the loop and clip each end into a “V”.  VOILA’!  Perfect bow!

*Note* I tried a big glue dot to adhere  the ribbon to the card, and it just did not hold up at all – by the end of the next day, the bow had fallen OFF!  Horrors!  I solved this dilemma with a couple pieces of sticky tape instead.

Until next time…Keep Calm and Find Yourself a Rubber Stamp!