Bunnies, chicks and onesies!

Onward with our calendar pages!  As the “blessed event” is supposed to happen in early March, the 2nd and 3rd pages for the calendar are for April and May.

April is, of course, Easter and the beginning of spring here in Maryland, so the “Heaven Blessed” stamp set from the Occasions Mini Catalog was perfect for the job!  Did I say I like to paper-pierce?  This is a perfect example!  All the little rabbits, chicks and the adorable little girl with her Easter basket are from that stamp set.

So far I am going with the lacy border idea.  The Lace Ribbon Border punch was so easy to use to make this border!  I spritzed it with the gold smooch spritz for a littel extra bling!
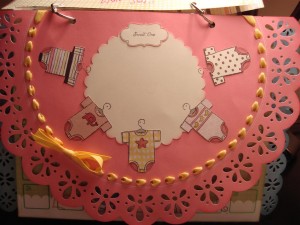
The pink doily page was an idea that I think started percolating when the onesie jumbo roller came out a year or so ago.  I finally CUT APART the roller *GASP* and made 5 separate stamps so that I could position them around the scallop circle frame for this page.  The details of how I did that will be posted tomorrow.  I also punched holes around the inside edge of the lacey part and threaded the ribbon through those holes for the embellishment.  This page is a real WINNER as far as I am concerned – LOVE it!

Ed. – when I actually attended the baby shower, the father-to-be recounted a story about one of his friends who had become a new dad.  Apparently he had not heard the word “onesies” pronounced and thought for quite a long time that it was pronouced “On-E-Z’s”!  THAT was pretty funny!

Until tomorrow…Keep Calm and Find Yourself a Rubber Stamp!

Baby Calendar Scrapbook – the saga!

As I said yesterday, I had the bright idea of creating a baby scrapbook and calendar together for an upcoming baby shower.   Well the idea came to me in a flash, however, the actual construction of same did not!  It was quite a challenge to create all 12 pages as I did try to make each one different!  I used tons of paper, stamps, punches, inks, and techniques….

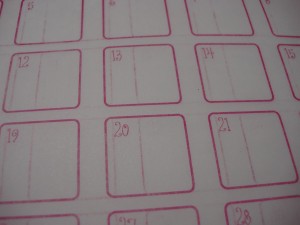
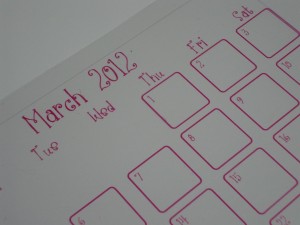
To recap, for the calendar part, I decided to make clear pages, printing the calendar for each month so that you could see the scrapbook page underneath.  Here’s the clear part:


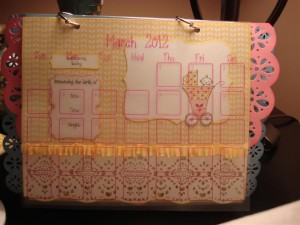
The calendar page overlay with the scrapbook page behind it:


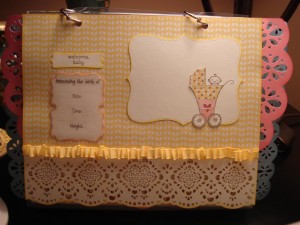
 …and finally just the scrapbook page…

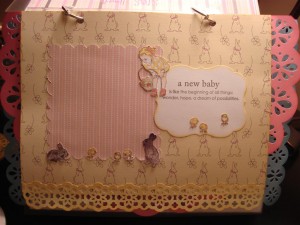
I love the baby and baby carriage – I paper-pierced the image and attached it to the top note label, then stamped the baby on the label.  Do you recognize the lace border?  I re-purposed the bottom of two “Designer Cuts” cards from the Occasions Mini Catalog!

Since this is a special gift, I did use some retired Stampin’ Up products.  Nursery Suite was a designer paper pack from last year and I could not resist the adorable doily pages (the pink and blue lacy pages peeking out of the edges in the photo).  The patterns from the rest of the pages were so versatile that I used them on many of the calendar pages. 

Stay tuned for tomorrow’s post, and several more after that, for the rest of the story!

Until then… Keep Calm and Find Yourself a Rubber Stamp! 


Window Sheet Wonder

Nothing like a last-minute project (gift!) to stir my creative juices!  I am so excited – there is a baby on the way (noooooo! not me! – it’s the branch of the family tree belonging to my second cousins!) and lots of family is gathering on Sunday for a SHOWER!  It has been a VERY long time since I have had to have a baby gift, so I am quite unprepared.  I could take the easy way out, sure, and BUY a gift, and I MIGHT have to resort to that if this project is not nearly complete by Saturday, but I’m going to make a supreme effort for two reasons.  FIRST, I am just a crafty person!  Someday I will put my metalsmithing skills to task and make a little silver cup for some lucky baby, but that won’t be now.  SECOND, I am woefully lacking in the scrapbooking area and I have been mulling this over for several months with no project that has called to me.  Until.now.

Coincidentally I received an email from “The Craft Channel” about a product that they had on sale, ring binders without the notebook.  (The story of whether I will or will not acquire these is for another day!)  The important part is their video of how they used one of these in a project!  They adhered the ring binder to the top of a plastic picture frame, the kind you might see a store sign in (this will become more clear as the project progresses!)  So my idea is to use the plastic frame as a calendar base, and, since I don’t have those binder rings quite yet, drill a couple of holes in the top for split rings, and hang calendar pages from the rings.  I know you are saying, at this point, so what is so scrapbooky about this?

AhA!  I am going to make the calendar pages CLEAR!  Underneath each one will be a scrapbook page with one or two places for photos of the new bundle of JOY!  BRILLIANT Yes?  Well, as you might have guessed by now, not ALL of my plans go smoothly! 😉

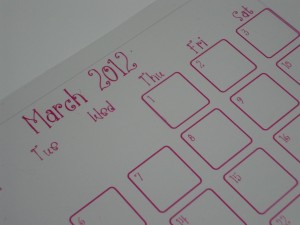
First I thought that vellum would be good, the photos would show through with an artsy kind of haze.  Ummmm the printer did not agree to this plan!  See the shadow pink lines????  They are NOT on the original.

What to do…….to the rescue, Stampin’ Up Window Sheets!  I chopped one down from 12×12 to 8 1/2×11 and fed it into my trusty Color LaserJet, keeping my fingers CROSSED!

Voila!  I am totally thrilled! 

If you are wondering how I created the calendar, I did use Corel Draw.  I am not as fast as I would like to be with Stampin’ Up’s design software, My Digital Studio, and while I am sure I could do this with MDS, I don’t have the TIME to fiddle with it! 

Now onto the scrappy pages!  I will have to use some retired paper – Nursery Suite Specialty – since I hadn’t gotten ANY of the current “baby” Designer Series papers, much to my chagrin!  But it will be beautiful, because, retired or not, that paper is cute, cute, cute! 

Stay tuned for the next installment!  Until then…Keep Calm and Find Yourself a Rubber Stamp!
 

Another Sweet Floral

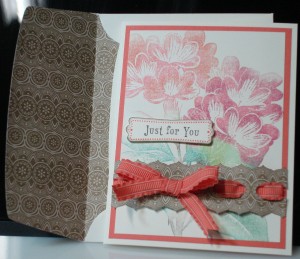
Stampin' Up, Sweet FloralThe original material that I saw used to make a multicolor stamp pad is “Cut-n-Dry” Felt.  This image was the result of using that method.  The density of the felt vs the textured surface of the paper towel that I used in an earlier post did make a big difference in the detail of the flowers, but I still like the texture from the paper towel method too!

I am continuing the experiments with strips of the Twitterpated Designer Series Paper, and Like this one as well.  I just cut carefully along the pattern line to create the decorative edge.  It is the same paper as the envelope liner.  Can you pick out the part that I used? 😉

I do like the sentiment font and the sweet pattern around it (from “Tea Shoppe” – 2012 Occasions Mini Catalog) – they fit perfectly in the Modern Label punch.

Until next time…Keep Calm and Find Yourself a Rubber Stamp!
Doily Just for You

With some cards, I have the idea and it is only a hop, skip & jump (or cut, stamp and glue) to the final card.

Other times, it.is.a.process!  When I am searching for my muse, it can come from leftovers on my bench, a color combination that is particularly fetching, a paper pattern or even a tool or supply that I have been wanting to experiment with.  With this card it was almost all of the above!

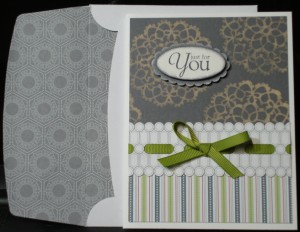
I revisited the bleach technique… this has such a “batik” look about it.  Then I had a little exploration with one of the Twitterpated paper patterns – resulting in the wide strip the ribbon is woven through.  Me likeeeeee! (The details about this are in yesterday’s post…) The striped pattern and the envelope liner are also patterns in the Twitterpated collection, so while they are quite different patterns, the basic gray color in all of them pulls this into a cohesive design.

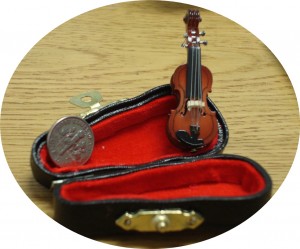
The rest of the story…. This card is headed out the door.  One of my cousins (well, all of them in this branch of the family tree) is very musical and plays the fiddle in a local band.  I LOVE to shop on Etsy (www.etsy.com) and came across this little gem from a gal in Germany (her shop is “miniblings“)!  How adorable is this?  The violin case is just perfect.  The violin is actually a brooch (pin on the back).  My ‘cuz will be so surprised!! Love it!

 Until next timeKeep Calm and Find Yourself a Rubber Stamp!
 

Twitterpated and Fiddley

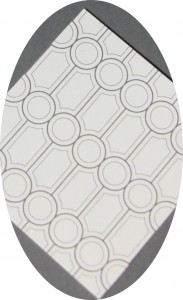
The new Designer Series Paper, “Twitterpated”, from the new 2012 Occasions Mini Catalog, has this awesome graphic design on one side of one of the papers.  When I measured the circles they were exactly 1/4″!  Yowsah!  Get out the paper punch!  I wasn’t sure where I was going with this, but since it was neutral (basic gray), any color will pop with it.

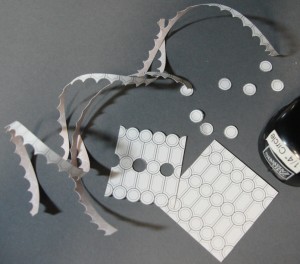
I do have a “fiddley” nature, and don’t mind cutting little details (whether it is paper or metal), but any time I can use a tool to speed the process, it is all good.  First I paperpunched each hole in the line across the paper,  which was interesting and left me with 2 pieces of paper and the “reverse scallop” edge on each.  Next I did every other one…better.  Now I can see 1/4″ ribbon woven through the holes.

But, do I use a straight edge when I have those interesting potential scallops?  Checked the scallop punch – it did not line up.  It’s up to my trusty detail scissors to hand cut the scallops….

Here’s what I ended up with…gosh I want to use all the “remains” on SOMETHING!  maybe a future project.  BUT the little sample in the center is the bomb!

You will have to wait until tomorrow for my finished card – I think it was worth the effort!


until then…Keep Calm and Find Yourself a Rubber Stamp!
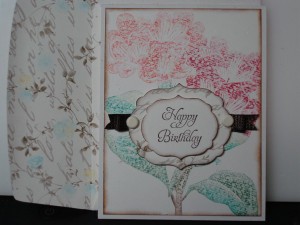
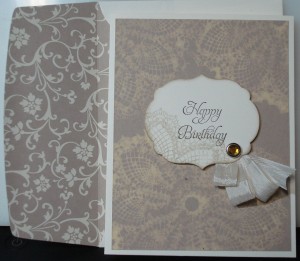
Sweet Floral Happy Birthday

I confess, I love to surf the ‘net!  I get tons of inspiration from OPB (Other Peoples’ Blogs) 😉  Probably the most fun is seeing if I can recreate a design, technique or whatever catches my eye with Stampin’ Up products.  In this case, I think it came out BETTER than any of the samples that I saw out there in bloggerland.

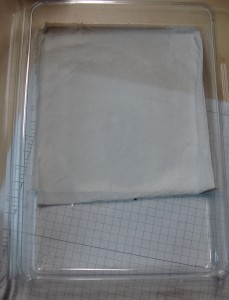
In the samples that I saw, they used a stamping product that was a dense foam with the foam on one side and then a fabric of some kind covering the foam on the other side.  This “fabric” side is the “business” side of the “stamp”, kind of like a scrubbie has a sponge side and an abrasive side.  Taking a leap from my most recent card-venture, the bleach technique, I thought, why not a paper towel pad again?  Soooo, folding up my towel, I started the process.

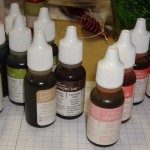
First you ink up your stamp with Black Staz-On ink (you don’t want a water-based image that will bleed into the colors that follow).  Stamp the black image onto the paper pad.  Then it is reinker time!  I used no less than 11 reinkers: 5 shades of green for the leaves, 2 shades of brown for the stems, 4 shades of pink for the flowers.  Here’s the fun part!  just squeeze the reinker over the area that you want colored.  It doesn’t even have to be precise!  In fact, there is no way you can keep your ink from spreading out anyway as you can see from the photo here. 

The magic happens when you ink your stamp from this paper stamp pad! The shading is really life-like!

What I did not expect (DUH!) is the texture from the paper towel.  It is interesting in a graphics kind of way and thought provoking (as in “how did you do that???”).  You could experiment with different surfaces such as gauze, tissue paper, or a finely woven cotton, either AS a stamping pad or on TOP of your paper pad.   (ed. –  or several layers of felt.)

The serendipity with this project was the sweet pattern from Attic Boutique Designer Series Paper (2012 Occasions Mini Catalog).  The colors were PERFECT! 

So find one of your stamps that lends itself to multiple ink colors and try this technique!  You should be able to get at least 2 stampings from the “pad”, and even add more ink as it dries out. 

 Until next time…Keep Calm and Find Yourself a Rubber Stamp!
Bleached Doily

In October 2010, Stampin’ Up had a regional meeting of demonstrators in Baltimore – it was nearly overwhelming!  Swaps, new friends, and a very busy program had my head in a whirl by the end of the day.  There were lots of WOW techniques demonstrated as well, and one that really got my attention was the bleach technique.  It is soooo easy and sometimes you really never know what color the bleach will reveal – it isn’t always white! 

I had been wanting to try this again, and the crumb cake paper seemed as good as any to start with.  “Hello Doily” background stamp is one of my all-time fav’s and you can see here it really looks as though I pressed a vintage doily into the paper!  With the bleach technique, you make a stamp “pad” of several layers of paper towel, pour on some bleach, and press it around until the paper towel is soaked.  Not so much bleach that there is a puddle, though, after the paper has absorbed as much as possible.  You just need the towel to be “juicy” like a new stamp pad.  Press your stamp onto the paper towel, then press firmly on your paper.  At first it will look like you have just stamped with water, but set your stamped paper aside a let it air dry.  As it dries out, the image will appear lighter and lighter.  Make sure you clean your stamp with a bit of soapy water to get all the bleach out – you certainly don’t want it to contaminate any future INK PADS that you use it on!

I lined my envelope with a beautiful pattern from the Mocha Morning Designer Series Paper pack.  I KNEW there was a good reason to use crumb cake on this card!  They are gorgeous together!

Until next time…Keep Calm and Find Yourself a Rubber Stamp!
Button Brads and Gathered Lace

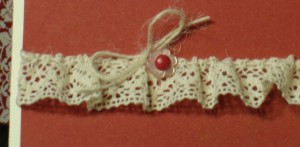
I wanted to create a little vintage look, like a lace curtain across the card.  So I threaded some twine through the holes at the top of Victoria crochet trim (pg. 194, 2012 IB&C Catalog).  The ends of the twine and the lace were adhered with “snail” to the back of the card.  It was a bit droopy, but tape or adhesive would have made it too stiff, so I decided a strategically placed brad would be perfect. 

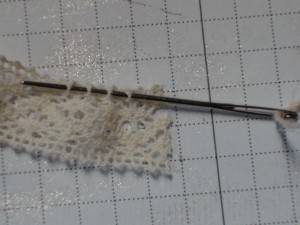
Here’s a pic of the way I threaded the twine through the holes at the edge of the ribbon – easy-peasy!  I just gathered it a little and once it was adhered to the card, evened the gathers across.

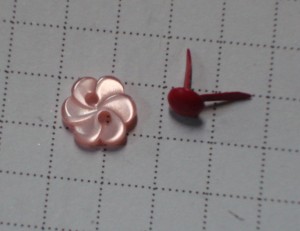
Searching for the perfect embellishment, I realized that we had these adorable buttons as part of the 2012 Occasions Mini catalog, to match the Twitterpated Designer Series Paper, but the pink one was just too pale by itself. 

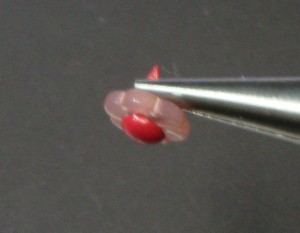
Hmmm, I wonder if the brad “feet” would fit through the button holes? 

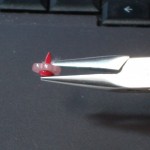
A little assistance from my handy pliers, and I had my “button” brad!  Perfect!

Until next time…Keep Calm and Find Yourself a Rubber Stamp!
Another Thank You

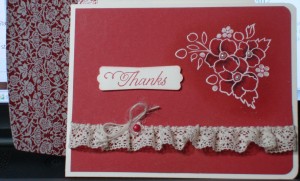
Bordering on Romance has taken my studio by storm!  I really like the simple lines that can be used as is, colored in, or, as in this card, embossed.  The card is Riding Hood Red, and the stamp embossed in white embossing powder.  I sponged over the embossing in real red, and wiped it off the embossed part with a soft cloth.  The dark area near the inside of each petal is bravo burgandy, then blended with pink pirouette.  You can’t see the pink, it just blends the burgandy strokes more softly.  A little Smooch Pearlized Accent Ink in Moonlight filled in the small blossoms.  A final pearl accent on the centers of the flowers is the finishing touch.

I added two details to the card that are a little unusual.  Can you pick them out?  I’ll describe how to make them in tomorrow’s post!

Until then…Keep Calm and Find Yourself a Rubber Stamp!