Pink Pearls and Envelope Envy

White Pearls can become custom colors with just a swipe of a marker.  However, the marker has to be alcohol based or other permanent ink. 
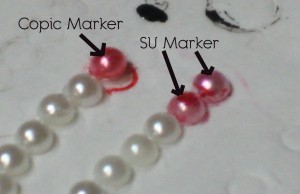
Here’s what happens when you use the water-based markers – at first it looks great, then it pretty much wipes right off!  I have a nice selection of copic markers and since they are alcohol-based, they work.  Sharpies would also work.

Another detail that I have just fallen in love with is an envelope liner.
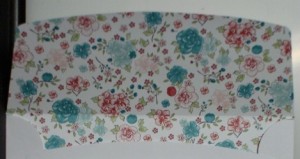
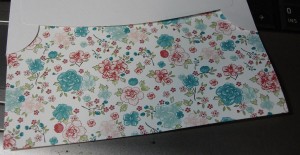
I did a little research (no sense re-inventing the wheel!) and found a great little video by Mary Fish.  She recommends cutting a piece of patterned paper 4″ x 5 11/16″. Yes, 11/16ths.  It works perfectly.  Insert your paper piece inside the envelope, leaving just a bit past the flap.
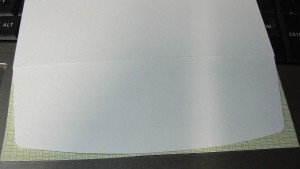
Run adhesive or glue around the edge of the envelope flap.  Flip over and trim the excess off with scissors.  For a perfect fold, score the flap again on the original fold line.  Downside: you will have to add glue to the flap.  Just about anything will do.  I have seen a formula for making glue that you can brush on, dry, and then lick to stick.  I’ll try to find that and post at a future date.

Until next time…Keep Calm and Find Yourself a Rubber Stamp!

Bordering on Romance Thank You

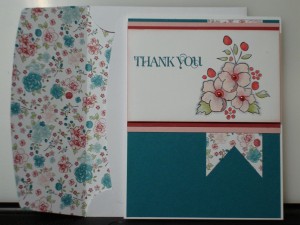
Recently, there was a blog tour on the Exclusive Stampin’ Up Demonstrator site, SUDSOL.  One of the cards in particular using the Bordering On Romance set and Twitterpated Designer Series Paper, “called” to me!  Both the stamp set and paper are available in the 2012 Occasions Mini Catalog.  The original design (Thanks, Cristyne!) is here.

 There are lots of “crafty” details to this card that make it a “WOW”! 

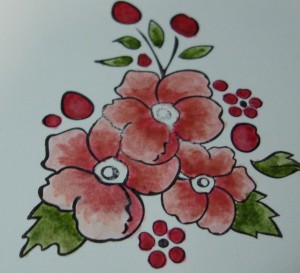
The first is the coloring technique – you could use Stampin’ Up’s great markers, watercolor pencils, watercolor crayons, or even ink up a brush from the stamp pad or reinker. 

If you are using any of the water-based inks to fill in the flowers, then you will need to stamp the image with black Staz-on so the ink doesn’t run. 

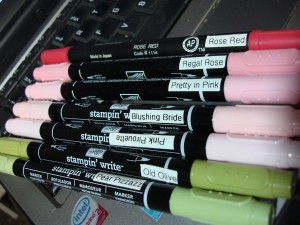
These are the SU markers that I used on the sample below. 

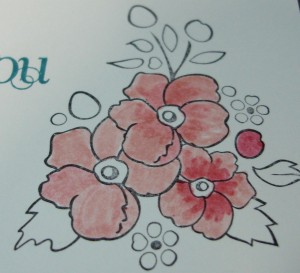
To illustrate the steps, I used Blushing Bride on all 3 flowers, then Pretty In Pink just on the part of the petals nearest the center for the top flower and right-hand flower, then finally, Regal Rose on the right-hand flower.  You can see the color difference of the layering effect – the little circle on the far right is Regal Rose by itself.

After the Regal Rose step, I went back with Pink Pirouette and tried to blend the layers a little better.  To get the darker ink off the brush tip of Pink Pirouette, I would just swipe it against my finger or scrap paper as I went along.  In retrospect, I could have used a damp Q-Tip to blend the colors a little more.  Here is the final product:

Tomorrow:  the rest of the story – pink pearls and envelope envy!

Until then…Keep Calm and Find Yourself a Rubber Stamp!
YouTube here I come!

“Try not. Do… or do not. There is no try.” Yoda

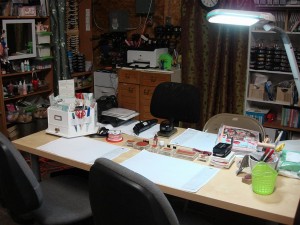
Well I did not try, I DID!  Nothing like jumping in the deep end!  I’ve recorded a video tour of my stamping studio (the stamping PART of my studio…).  No editing, WYSIWYG!

httpv://www.youtube.com/watch?v=hgwbd_jqiq8

and my all-important stamping table!!!

httpv://www.youtube.com/watch?v=e5uJHSIr6pU&feature=mfu_in_order&list=UL

Until next time…Keep Calm and Find Yourself a Rubber Stamp!
Clean and Organized (where it counts)

This is one of those times when you say “take a picture QUICK, ’cause it may never look this good again!” LOL!  I have spent literally MONTHS re-organizing my studio.  It was so packed full of STUFF that my stamping area was actually about 1/6th of this table (that’s all that was CLEAR), with room for a chair.  YIKES!  I have cleared so much out that I actually have room to hold a CLASS.  I have 4 of these IKEA tables, and I can easily set 3 of them up now!  YAHOO!  (even the RUG is clean!!! – Thanks Charles!!!-my artist buddy down the hall pitched in to help at the 11th hour)

I still have MUCH to do, but to have this area clear gave me such a breath of RELIEF!  I can even say that the end is in SIGHT! 

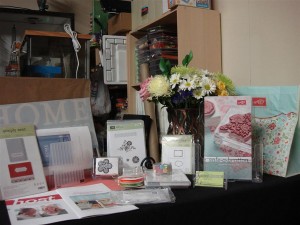
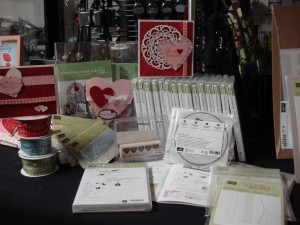
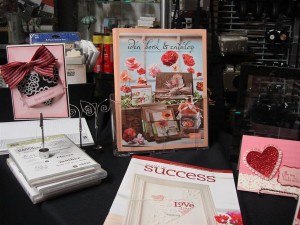
I have some gallery showcases that I thought I was going to have to unload, but another friend had a brainstorm and they are BACK!  I’ve covered them with a black tablecloth and set up my displays


for Sale-a-bration,


the Occasions Mini


and the IB&C …and “SUCCESS” magazine front and center, just in case someone MIGHT be interested in becoming a demo:-).

I was soooo glad that I thought of this, because I think it really impressed my first workshop visitors!


Until the next post…Keep Calm and Find Yourself a Rubber Stamp!
A historic building and a surprise!

Have I mentioned that I have an AWESOME studio?  It is quite large and housed in a sprawling, VERY industrial and Historic factory, Crown Cork & Seal.  Some buildings on the property date back to 1892, the founding of Crown Cork & Seal Company in Baltimore, MD.  Originally the company invented a method of sealing bottles.  During prohibition, they switched from capping beer bottles to capping soda bottles to stay in business.  Following new inventions in sealing tin cans, several mergers and aquisitions, and expansion of operations worldwide, the headquarters was moved to Philadelphia in 1958.  I’m not sure when they completely moved their operations out of the Baltimore plant, but the current owners have built artist and artisan studios among other various tenants in many of the buildings.  One building has 6 FLOORS! 

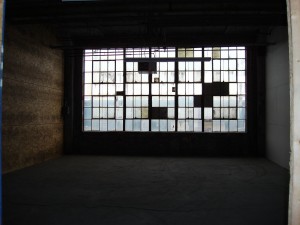
My studio has a wall of Windows – 133 in fact – you can see what it looked like 3+ years ago, right before I moved in!  I’m sure they are the original windows, although my building is not one of the oldest ones.  I might add that the caulk, iron framing and brickwork is also original, so you can guess that it is far from airtight!  Winters can be chilllllly!  Funny things happen in old factories.  When it rains, the concrete actually SWEATS in the stairways and hallways.  We have freight train tracks on the front and back sides of the factory, and sometimes you are stuck trying to leave or enter as a train is STOPPED in front of the entrance.  I have twiddled my thumbs there for nearly an hour on occasion, and you really have to WEEDLE the guards to open the back gate at night if you are stuck.  The building actually SHAKES when a train goes by.  Normally you don’t even notice – it’s not like an earthquake.  But once in a while I see my printer table vibrating – kind of CREEPY, especially after the earthquake we had this fall!  aaaaannnnddd…. yes, there is a POLTERGEIST!  I am convinced!  One of my artist buds down the hall went up to the next floor – unused, but recently cleared of a lot of junk, dirt, pidgeon crap, etc.  He took a picture with his digital camera – and when he looked at the photo, there was a foggy CLOUD right in front of him.  No cloud in real life!  He took another, and the foggy cloud had moved to the left.  Again, no cloud in real life!  One more pic and the cloud was gone.  When he showed me the pics, HTG, there was a FACE in the cloud.  Yup, REALLY CREEPY!  So now when something goes missing that you JUST put down a few minutes ago, we blame our little Casper.  THAT took me a while to come to terms with and get comfortable again in my studio, let me tell you!

Until tomorrow…Keep Calm and Find Yourself a Rubber Stamp!
Sweeties Valentine Card

…and you thought I would stop at the Sweetie HEARTS????

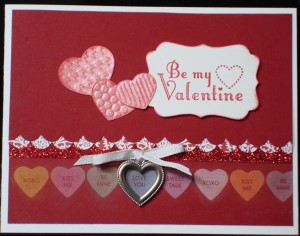
Let’s see…. I managed to use 2 punches, an embosslit, glimmer paper, Shimmer Spritz, sponge dauber, Designer Series Paper, Ribbon AND a Trinket Heart!

You could actually call this card GREEN because I used up so many bits and pieces that were left on my bench after all the other V-day cards had been worked out!

I have been wanting to try out the trinket hearts and keys, so when I pulled this heart out, it matched the size of the Sweetie heart PERFECTLY!  This would be so much fun as a SLIDER or wheel card!  Punch out the heart under the trinket and have the sweetie hearts slide back and forth or the wheel turn so different Sweetie Sentiments show through the heart!   What do YOU think???

Do-Overs:  If I were to do this card AGAIN, I would punch the red glimmer paper with the scallop punch also and offset the scallops as I did with the DSP and cherry cobbler layers.

Hint: To offset the scallops perfectly, cut your layers a little larger than the card.  After punching the scallop borders, line them up and trim the excess edges to the size of the base layer.

Until next time…Keep Calm and Find Yourself a Rubber Stamp!
Sweeties and chalk

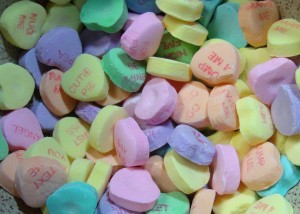
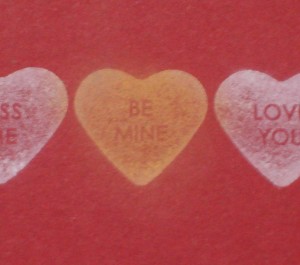
Remember these?  When I discovered the “Candy Conversations” stamp in the 2012 Occasions Mini Catalog, I knew EXACTLY what I wanted to do – Chalk Technique!

For this method, you need to ink your stamp with Whisper White Craft Ink, and stamp (usually) on a darker paper.  You will need  some kind of chalk “media” – Stampin’ Up has a full palette of our signature colors in chalk, so you can match every one!

Here’s the stamp inked up.  Notice I have managed to just ink the stamp along the edge of the stamp pad to keep ink off of the sentiment.  You should wipe any boo-boos off before you stamp.

Here is the stamped image on our darkest red card stock, cherry cobbler.  The nice thing about the craft ink is that it stays “wet” a little longer, so you have a minute or so to choose your colors and chalk it up.

I chalked a different color on each heart for my card, but you could just color one and use your embossing gun to dry the rest of the chalk ink for a single “pop” of color.  The inportant tip here is to make sure you have plenty of chalk covering the ink.

The final step is to wipe off the excess chalk with a soft cloth.


Curious about the card yet?  The final details tomorrow!

Until next time…Keep Calm and Find Yourself a Rubber Stamp!
Dazzling Details meets Jelly Bean Brads!

Onto the BRAD!!!  Well, a glitter bow needs a glitter brad, right?

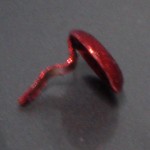
We have Stampin’ Up absolutely gorgeous glitter brads in many colors, so I proceeded to ATTEMPT crimping this bow with a red one.  Sadly, at least 4 brads later, they all looked like this:

Not good.  Clearly the brad is just too small to stand up to the bending and shaping required to get it around the bow. 

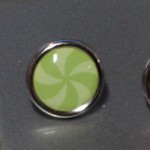
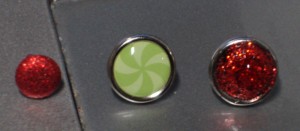
Plan B.  When I looked over the available (current catalogs) brads, I realized that the Occasions Mini had larger ones – the Jelly Bean Brads featured on page 35 of the 2012 Occasions Mini Catalog! 

We also have our first “glitter glue”, called Dazzling Details (cherry cobbler color), available in the Occasions Mini.  AH-HA!  By squeezing the Dazzling Details over the top of the brad and spreading it around with the tip of the container, I was able to get a goodly glob of it on the jelly bean brad.  It did take quite a bit of drying time, so you must be patient, or not plan to use the brad until the next day.  The “glob” compresses down to the top of the brad once dry, so don’t worry too much about your mound-o’glitter.  I did find that once it dried, it was VERY hard to remove from the silver ring around the brad, so use your fingernail or a toothpick to wipe off the silver ring BEFORE it dries. 😉

Until next time…Keep Calm and Find Yourself a Rubber Stamp!
Faux Bow

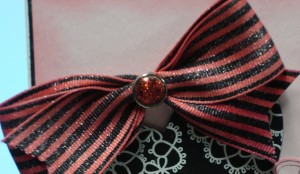
Remember this bow?

It was the final result of a day-long experimentation with re-inkers, craft re-inkers, contraband re-inkers, smooch spritz and shimmer paint.  After nearly permanently red fingers, bleeding too much ink (bleeding used both as a verb and expletive deleted here…), and a whole BOTTLE of Champagne Shimmer, the easiest (and SU-product) method turned out to be sponging on the shimmer, dry with heat gun then follow with real red marker and a final dry with the heat gun.

Faux Bow, you say?  Why yes, glad you noticed! Cut 13 inches of the (inked) ribbon and lay flat on the table.  Fold the two ends in over each other, so the layers are evenly in thirds.  Pinch in the middle and fold the brad ends AROUND the ribbon, crossing over in back, and press as flat as possible.  Gently pull the end on the right down from the loop and clip each end into a “V”.  VOILA’!  Perfect bow!

*Note* I tried a big glue dot to adhere  the ribbon to the card, and it just did not hold up at all – by the end of the next day, the bow had fallen OFF!  Horrors!  I solved this dilemma with a couple pieces of sticky tape instead.

Until next time…Keep Calm and Find Yourself a Rubber Stamp!
Valentine Schmalentine!

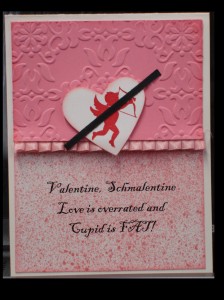
Here it is as I promised!!! Valentine Schmalentine!  Just to prove there is something for EVERYONE on Valentine’s Day.  I saw this phrase somewhere in my travels, and could not get it out of my mind.  The font is “Black Adder ITC” – think it was a font included in one of the software packages on my laptop, because I did not download it specifically.  The cherub stamp, pleated ribbon and smooch spritz (I keep wanting to type “SCHPRITZ”! LOL) are all from the new Occasions Mini Catalog.  I did the printing right on Stampin’ Up’s Shimmery White Card Stock, and it printed beautifully!  I positioned it so that I could cut 4 cardfronts from the paper.  You can do this in any word processing program, even MDS (My Digital Studio), however I am a Corel Draw gal from wayyyy back, so that is what I set this up in.  If anyone would like specific instructions, please feel free to contact me.

I am in the process of setting up a special section on my blog that features content only available to my newsletter subscribers.  Detailed instructions for all of my cards will be there, as well as a few other surprises.  Where do you subscribe?  Well keep tuned as I have a February 15th startup date planned for that.  To celebrate, I will have a bunch of give-aways, and it is all FREE!!!

If you’re not sure about subscribing, not to worry, I will still have posts just like this available to everyone!  You can decide to sign up later on if you get CURIOUS! 😉

Until next time…Keep Calm and Find Yourself a Rubber Stamp!