Fiddley Level = 11! (Day 5)

A clear jar – challenge! – Window Sheet! Challenge solved! 

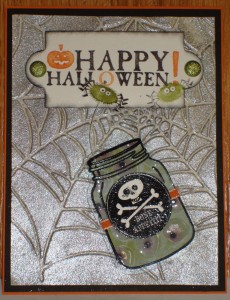
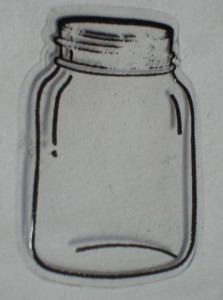
As you can see, I have stamped the jar from the “Perfectly Preserved” stamp set in versamark ink onto a piece of our awesome window sheet.  Then I embossed with black embossing powder.  If you have our NEW heat tool, there are 2 settings, and you can emboss on the low setting without melting the window sheet.  I CAREFULLY embossed with the old heat gun (only one setting – high!), by keeping the gun moving back and forth across the embossed area until all powder has melted. 

Then I cut the shape out with the jar from the “Cannery Set” framelits.  After this was done, I didn’t like the curved line at the bottom of the jar – so I just scraped it off with my fingernail!  In a perfect world, I would have masked the stamp with tape in that area when I inked it with the versamark, or removed the embossing powder with my fingernail before I embossed the jar, but the adhoc approach worked, thank goodness!
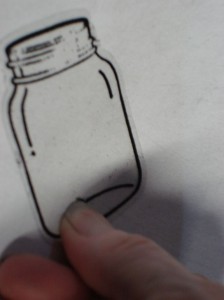
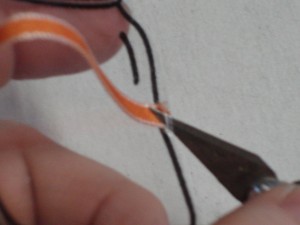
Next, I cut a slit in the plastic, right outside the jar line, to insert the ribbon.  I used my craft knife to “grab” the ribbon and pull it through the slit.  Since the Framelit cuts about 1/16″ outside of the stamp image, there is just enough room to make the cut.  I pulled both ends of the ribbon so that it sat flat on the “jar”.
For the label, I tried stamping it in basic black on the shimmer paper (my favorite label material, since it is a little stiffer than the whisper white paper).  That was not quite dark enough for me, so I tried it with versamark and black embossing powder, and that result was PERFECT!
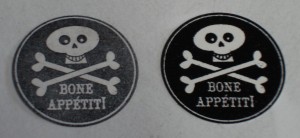
I snailed the back and attached it right over the ribbon. 

Now it is time to attach the “eyeball” layer.  I adhered two glue dots to the back of the clear jar, right behind the label, so you cannot see them from the front.  Then I snailed the back of the “eyeball” layer just across the center where the ribbon would go, and wrapped the ribbon around that layer.  

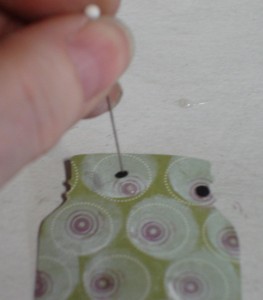
Now I punched a 1/16″ hole through both layers of the jar (window sheet & eyeball paper), near the top of the jar (see example).  This is for the spider’s fishing line!  Feed the end of the fishing line through the hole (make sure SPIDEY is still attached!) and add a dimensional over the end.  I adhered several more dimensionals to the back of the “eyeball” layer, and pressed it down to the spiderweb card front. 
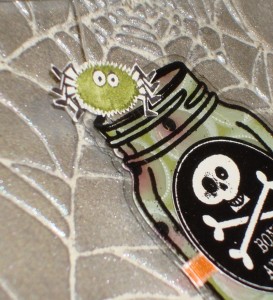
I think we are neeeearrrly finished!  Tune in for tomorrow’s wrap up!

Until then…Keep Calm and Find Yourself a Rubber Stamp!

Fiddley Level = 11! (Day 4)

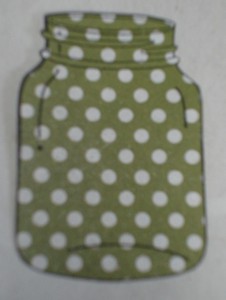
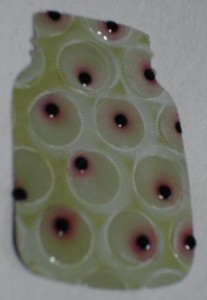
My Jar of “eyeballs” started with the large white circles side of the Old Olive sheet of Polka Dot Parade DSP.   I  stamped the other side (white polka dots) in basic black with the jar stamp from Perfectly Preserved, and cut it close to the outside stamped line (fussy cut).

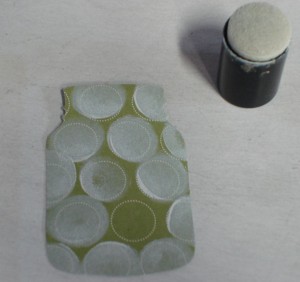
I flipped it over to the other side and with a sponge dauber and whisper white ink, I pressed it into each large circle, with a little twist.

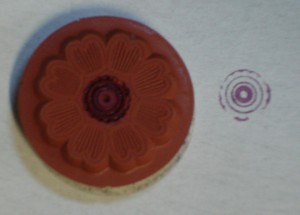
Next, I had to find a “retina” image for the eyeball, basically a few small concentric circles.  There is a small flower in the “Lacey & Lovely” stamp set that has the perfect image:

I inked the center with Rich Razzleberry marker and pressed the stamp with my fingers (Yep, no clear block!)  Using this method, I stamped the image on all of the white circles, sometimes in the center, sometimes near the edges.

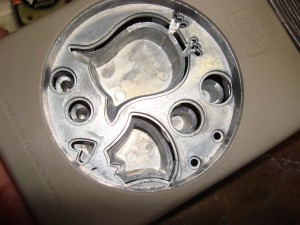
 Now I had to find a black center for the eye!  The smallest punched dot I could find was from the Owl Punch!  (see those teeeeeny tiny dots at the bottom of the picture?)  I squeezed a dot of crystal effects to the center of each retina and, using a straight pin to pick up the black dot, pressed it into the crystal effects.  I set this aside to dry for a few minutes.

The final step for this part of the jar is to squeeze a larger dot of crystal effects over each eyeball, spreading to the edge of each circle.  This has to dry for at least 8 hours – preferably overnight.  I hope these look like eyeballs as much to you as they do to me!

Next up: A Jar and a Label (Day 5)!


Until then…Keep Calm and Find Yourself a Rubber Stamp!
Fiddley Level = 11! (Day 3)

Spooky Spider!!

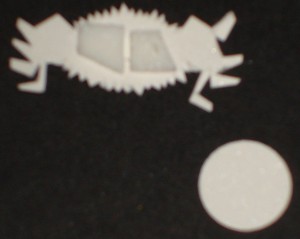
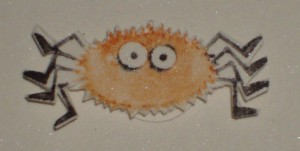
This little guy was “fussy cut” and then prepared to slide up and down on his own spider web.

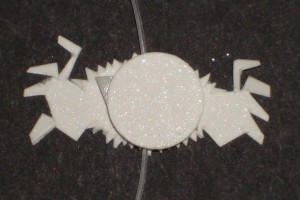
The view from the back shows the two bits of dimensionals that have been placed so there is a slot in between for the web (fishing line).  A small circle was punched and stuck to the dimensionals:


 The fishing line will feed through the slot so spidey can make his way up and down it!


Next Step: Jar of Eyeballs (Day 4)

Until then…Keep Calm and Find Yourself a Rubber Stamp!
Fiddley Level = 11! (Day 2)

LABEL MAGIC!

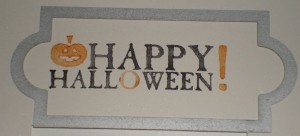
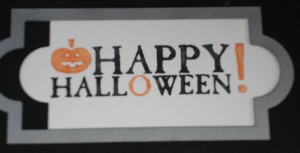
We have a lovely label die in the Apothecary Accents Framelets collection that is a long rectangle with two “bumps” on each end perfect for brads or securing ribbon through holes. It is a bit long for some sentiments, and I found I can get it the perfect length using this technique.:

First I stamp my image and then center it vertically under the die. I shift the die close to the left side of the stamped image and run it through the Big Shot. With the label still in the die, I shift the die to the right side of the image and run it through the Big Shot again. Now I have the perfect length for the sentiment!

Next up: Day 3 – Spooky Spider!

 Until then…Keep Calm and Find Yourself a Rubber Stamp!
Fiddley level = 11! (Day 1)

 Halloween always brings out the creative juices!  There used to be costumes made from scratch, much partying (and recovery time)…but I digress… that was MANY moons ago and these days, paper, ink and stamps satisfy my creative muse instead!

I had the opportunity to participate in a card-front swap of stamp sets in our new Holiday Mini catalog.  The stamp set I chose is called “Monster Munchies” and by the time the card came together, I had 4 stamp sets, an embossing folder, 2 sets of framelits, and flotsom from oodles of techniques (some I think I made up!) spread across my stampin’ table!  If you’d like to follow along with the process, I’ve broken it up into several posts – this was a looooong process!

Starting with the spider web layer, ink the spider web embossing folder with versamark ink, but only on the raised side.  After running this through the Big Shot, cover the paper with clear embossing powder, and gently brush off all the excess powder from the raised surface, leaving the powder in the spider web cavities.  Melt with the heat gun.  Spray with Silver Foil Smooch Spritz.   (Smooch always creates an amazing effect – and the silver is impressive!)  The embossing powder acts as a resist, and remains shiny and white against the silver background.

Next up: Day 2 – creating the label…

Until then…Keep Calm and Find Yourself a Rubber Stamp!
 

Howlstooth DSP – Thank you Stampin’ Up!!!

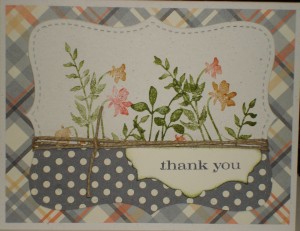
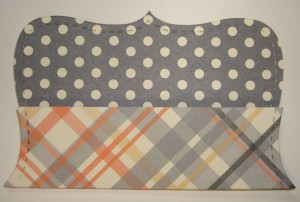
Here’s the scenerio:  Good friend has surgery.  I am at convention and this slips my mind (well, he did not say it was MAJOR surgery, in my defense!).  Two weeks go by (er, FLEW by) and I call.  Uh oh.  I am in.the.DOGHOUSE!  No get well card!  (…and we are getting together tonight for a concert)…hmmm two problems – manly card AND get well card – due in ONE HOUR!  YIKES!  Well, Stampin’  Up to the rescue!   A quick search online for a design to CASE, Check!  Search for appropriate stamps… Check!  Manly colors/design….hmmmmmm…. aHA!  Howlstooth and Herringbone DSP – a give-away from convention and in the new Holiday Mini Catalog.  Stampin Up has made all the color choices for me by providing Designer Series Paper collections with coordinating colors, designs, etc.!  I was even able to use the same page of paper, since the plaid pattern was on one side and the dots on the other, as you can see from the folded sample on the left!  Lovely soft grays and oranges – good for guys!  Love the plaid and dots together.  I found perfect flowers with Just Believe set from the 2012 main catalogue (released July 1st).   Soooo….. card in one hour?  CHECK!

You may notice this card has “thank you”, not “get well soon”.  That get well card went out the door so fast there was not time for a photo!  Ooopsy!  The good news is that I think this design works just as well for a thank you, birthday, or “thinking of you”!  (Did I say how much I LOVE this paper???)

Until next time…Keep Calm and Find Yourself a Rubber Stamp!
Convention 2012 Day 4

Day 4 (Satuday) – was our last <sob>.  Two more workshops in the morning, “I am earning an incentive trip” with Karen Hauley (#convention 2012).  This has to be the BEST reason for keeping your business goals on track – a FREE trip to FIJI!  Well, that’s what OTHER demos earned this year.  We did learn later on that the incentive trip for the 2013 grand vacation will be a Caribbean Cruise!  hmmmm…don’t think that bikini fits any more, so maybe I should start building my resistance for Mai Tai’s!  I finished up my last workshop with Donna Griffiths and “I am Savvy” (#convention 2012).  Now we are talkin’ stamping and techniques!  While I learned a lot and was totally inspired by all the other classes, getting inky is my passion, so this was fun, fun, fun!  Lots of samples and cool ideas for our ribbon, fabric and simply scrappin kits.  We finished with the final general session, part of which was broadcast LIVE to demos all over the world.  We also were given 2 MORE stamp sets (I think I ended up with 7 stamp sets, 3 boxes of fabric, buttons, rhinestones, ribbon, snail and 2 packs of designer paper! Now THAT’S what I call SWAG!)

Until next time…Keep Calm and Find Yourself a Rubber Stamp!
Convention 2012 Day 3

Day 3 (Friday) – Still with me?  After a morning general session we all went our merry ways to more workshops.  My first, “I am open for business” with Carrie Cudney (#convention 2012) was an eye-opener – lots of great ideas for finding new customers!    Can you believe that there was even a workshop about having FUN?  YES!  Shannon West was in charge of this one “I am having Fun” (#convention 2012), and I have learned you will be doing a lot of laughing when you see her name on the agenda!  I have also now learned that there is a SIXTH sense!  SHOPPING!  (Now I know I’m a natural, ’cause shopping is something that I have down to a science!)  I managed to squeeze one more workshop in my schedule, “I am Reaching Out”, with Emily Montoya (#convention 2012).  We learned important new texting words, like “AWHFY” (are we having fun yet), “E2EG” (ear to ear grin, and the best one, “Y!” (NOT what you are thinking – it means “typical man!”)

While I did not take any pictures at either of these workshops, I do have another one to share from the displays of our products at Stampin’ Up’s Headquarters in Riverton.

Until next time…Keep Calm and Find Yourself a Rubber Stamp!
Convention 2012 Day 2

Day 2 (Thursday) was our first general session, and WOW was it exciting (did I mention the song???)  We also had a speaker, Jason Dorsey, who explained the difference between “Baby Boomers”, “GenX and “Gen Y”.  I am CLEARLY a Baby Boomer, and Jason made EVERYONE laugh over and over again as he illustrated what makes each of us “special!”  I took my first workshop, “I am doing business My way” with Bonnie Thurber (#convention 2012) – Uber demos Ronda Wade and Tami White talked about what worked for them.  The second workshop that day was “I am making Money” with Pam Morgan (#convention 2012).  I was REALLY hoping to learn something here, because of course I would rather STAMP than SELL!  Pam did a great job, with the help of several demos who had the “making money” part down to a science.  Thursday evening ended with Awards Night – and I was in awe of what other demos had accomplished in terms of Sales, Recruiting and Leadership!

Until next time…Keep Calm and Find Yourself a Rubber Stamp!
Convention 2012 Day 1

i am……the theme of the 2012 convention!  This was my first, and I don’t know how Stampin’ Up could even top it.  It was FABULOUS!  I am grateful for my upline, Emily, for keeping me on track, and giving me the 411 on all the activities.  We were on the go from 6:30 in the am through probably 10pm at night, although most of the evening activities involved finding a place to EAT ;-). 

I filmed a short video of the beginning of convention, which will be on youtube shortly – I’ll link to it in a future post.  There is also a video of the convention song – soooo cute – I am still humming it!  That will be in a future post as well….so stay tuned!

The nutshell version is …stand in line EARLY (for whatever came first that day), watch swaps go on (which I could not participate in as I only prepared cards for a swap on Friday), chat with folks from ALL over the US & Canada, then rush to a seat, watch the presentation, and take off for the next thing on the agenda  – rinse & repeat!  LOL! 

Seriously, everything from the first session to the closing moments was fun, thought-provoking, inspiring, and just FULL of positive energy.  I did attend 6 workshops that were included in the convention package, and one add-on that was the perfect combination of stamping, samples and new products and techniques.  I can’t WAIT till my order comes in next week with the first of the items from the Holiday Mini Catalog so I can make samples for some upcoming classes (YES there will be CLASSES!)  The first day (Wednesday), we shopped at Memento Mall (oh yes, another loooong line), took tons of photos of cards, scrapbook pages and 3D samples, visited Stampin’ Up headquarters about 25 minutes away, and came back in the evening for the add-on class.

Until next time…Keep Calm and Find Yourself a Rubber Stamp!